Entertainment
How to Turn Yourself into Baby Groot
Guardians of the Galaxy was the breakout movie of the summer for many reasons — Chris Pratt, overall lack of competition, the general appeal of superhero movies. But, the true winner was Baby Groot, who shined harder than any other character despite appearing only for the last 15 minutes of the movie. Baby Groot danced into our hearts to the Jackson 5's "I Want You Back," and slowly won the Internet.
Here at Bustle HQ, we're obsessed with him — like, really obsessed. So, when throwing around pitches about everyone's favorite dancing fauna, the idea of a Baby Groot Halloween costume came up. I mean, it's inevitable. If there's an ALS Ice Bucket Challenge costume already making its way around the Internet, a Baby Groot ensemble surely needs to follow suit. So, being the intrepid journalist that I am, I decided to try and make my own Baby Groot costume, for as little money as possible.
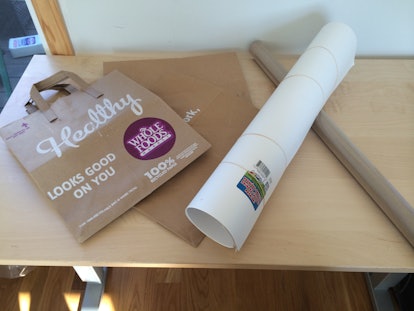
For this endeavor, I used items I had laying around at home or could easily find at a bodega: brown paper bags, brown paper, white poster board, yarn, a black pen, tape, and leaves from good ol' Mother Nature. This costume will not break the bank — although, it will leave you with ink stains all over your hands (a small price to pay for the overwhelming joy of being Baby Groot).
The costume has three components: crown, bodice, and pot. I'm going to break down each of these parts, so you, too, can become Baby Groot.
Crown
Cut a 3 to 4-inch horizontal strip of a brown paper bag for the headband. (For the headband and the bodice, use the brown paper bags as a base, as opposed to the plain brown paper, because it'll hold all the decorative detailing better.)
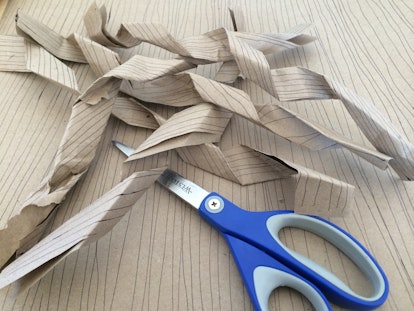
Then, take a long piece of plain brown paper and draw thin strips all along it — vertically, horizontally, it doesn't matter. The striped pattern will serve as the textured detailing on Baby Groot's branches, so whether they go from left to right or vice versa, or are messy as opposed to nice and steady, is inconsequential.

This is where you'll inevitably get ink stains all over your hands and work surface, so you might want to keep wet wipes at arm's length.
Once you finish the pattern, cut the striped paper into strips: about 12 inches long, 1.5 to 2 inches wide. You'll need at least nine, to get a full, appropriately branch-y crown. Then, roll up the strips, flattening as you go, so that they look like this:
Make sure that some strips (about three or four) are more flat than others, since you'll be collaging them on top of each other and you'll want to fill in any gaps. This will make sense in a second.
Now, it's time to build the crown. Take your flatter strips — which, from here on out I'll call branches — and place them about an inch apart on the headband. To secure them, fold the bottom of the strip under the headband and tape it on the inside. The back of the headband should look like this:
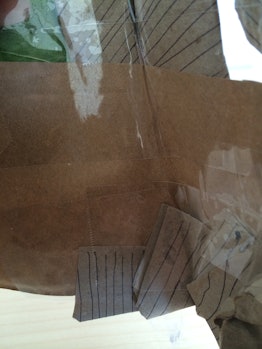
The front will look prettier, promise.
Now, take the more shapely branches and layer them over the flat ones, so that you have a nice, 3D arrangement going on. Tuck in a couple of leaves in there, keeping them in place with a small piece of tape. Secure the branches the same way you did the first layer by folding, then taping the bottom of the strip on the back of the headband. Once all your branches have been arranged in the front, add an extra layer of security by placing a long piece of tape across the top of the inside of the headband and the back of the branches. Then, add another one a little higher, just across the back of the branches. When you're done, the back of the crown should look like...
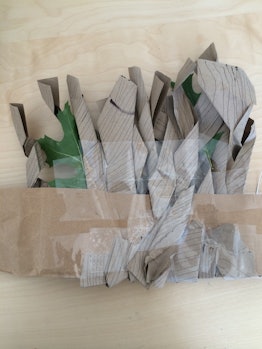
Not even Baby Groot wakes up flawless.
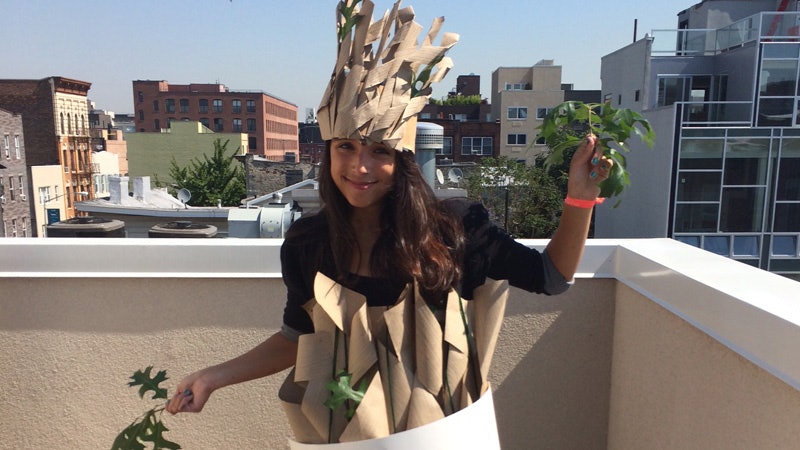
Fit the crown to your head (you might need to enlist a friend for this one), and voilà!
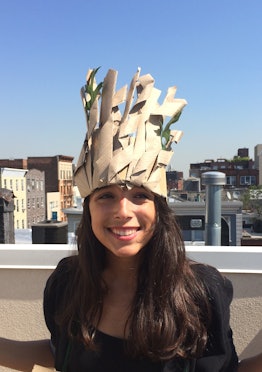
Here, the author and fearless DIY-er tries her best to not look at the camera while modeling a finished Baby Groot crown.
Bodice
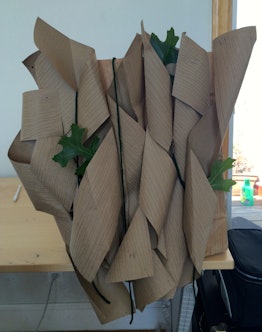
For the bodice, you'll follow a lot of the same steps as for the crown. Break down a brown paper bag, cutting off the handles so that it's just a circular piece of paper — that'll be your base. If you're feeling motivated, stripe the brown paper bag bodice like you did the plain brown paper for the crown branches.
For the bodice branches, take an even longer piece of the plain brown paper, and stripe away like you did the first time. This time around, you'll need about 8 branches (or, strips of paper), 18 to 20 inches long and 3 to 4 inches wide. (You might want to make them longer, depending on the size of your torso. I'm pretty short.) Again, you'll twist and flatten them to give them shape — although, you should make them a lot thicker than the branches for the crown. To secure them, fasten the branches to the bodice using rolled up pieces of tape. No need to fold and tape in the back.
As you'll notice, Baby Groot has some green stripes that run along its body. In order to achieve that effect, cut three or so pieces of green yarn, secure them at the top of the inside of the bodice with tape, and let it run down the front of the torso. Add some leaves here and there, for some extra greenery.
Pot
You're almost there. The last step is, luckily, the easiest. Baby Groot's pot is as simple as taking a white poster board, cutting out an outline of a pot (rounding out the edges for a more realistic silhouette), and using green yarn as suspenders to hang the pot on your shoulders. When you're done with that, fasten the bodice across your torso, put on the crown, and...
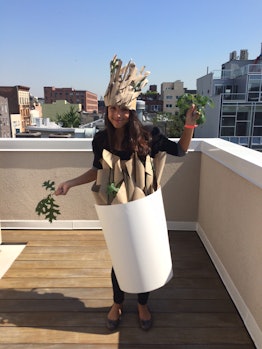
YOU ARE GROOT.
Now, to make this costume truly complete, you need context clues — or else, you're dressed as a potted plant. To round out the Baby Groot persona, carry around a smart phone, small boom box, or other music playing device, and blast Awesome Mixtape Vol. 1 or 2. And, you have to dance. I mean, that's the whole thing. Don't be shy — shake it off. You can make a gif out of it and everything.
Images: Ana Colón/Bustle (8), Yahoo
