Fashion
I Took Pinterest's Teeth Whitening Advice
Getting your pearliest whites can be a hassle, and not to mention, expensive. However, according to Pinterest, there is a plethora of at-home teeth whitening options that will save you time and money. In order to avoid going to the dentist for a long session, I decided to give one of the website's most raved about teeth whitening recipes a go. The DIY claims that by using hydrogen peroxide and baking soda, you can instantly whiten your teeth.
Now, that's a big claim for me. Instantly whiten? I didn't believe it. As someone who constantly on the hunt for ways to make my smile brighter, I knew nothing happened that quickly in the world of teeth whitening. In order to truly put this DIY to the test, I wanted to try it out for a week straight.
The recipe says to mix a teaspoon of hydrogen peroxide and a teaspoon of baking soda into your regular toothpaste. To be honest, I was slightly hesitant at first. I have pretty sensitive teeth, so the thought of putting hydrogen peroxide on them was daunting. I mean you can use it to clean wounds and stuff! However, after a little research I learned that hydrogen peroxide is very safe, especially compared to other bleaching options. Household hydrogen peroxide only contains three to six percent of the pure chemical, so as long as you dilute it, it's pretty harmless. Just don't swallow any of it.
Day 1
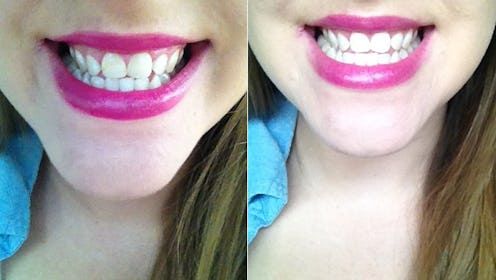
Here is my "before" picture to give you an idea of what I am working with.

Not too shabby, but obviously not Cameron Diaz white. Also, if you're interested, my lipstick is NYX Butter Lipstick in BLS05 "Hunk." Now, let's get started!
To start off the test, I gathered all the ingredients required to make this experiment work.

Next, I measured out the appropriate amounts of the ingredients. However, as I only had one teaspoon measuring spoon I had to opt for two half teaspoons of hydrogen peroxide. Yay, math.

After mixing the ingredients, you get something that looks like this. Obviously, the coloring will be different depending on your color of toothpaste. Mine is white, so it didn't look all that appealing.

Once coating my brush in the liquid, I brushed for thirty seconds. Not the best tasting stuff, but then again I wasn't expecting it to be. I was surprised to find that my teeth didn't feel sensitive afterwards. They felt completely normal, and pretty close to post-denist clean. Honestly, my mouth felt awesome.
Day 2

I totally added too much hydrogen peroxide in my mix on this day. The formula was way too thin. I felt as if I was drooling everywhere. Either way, this mixture is definitely easier to work with if it's in a creamier consistency. However, I still get the same deep clean while receiving a little bit of whitening. Still no teeth sensitivity, which is a major plus!
Today's lipstick: Covergirl Outlast in 405 Fairytale
Day 3

Not a major change from yesterday. My teeth are definitely the cleanest they have ever been, but I didn't see a huge improvement in overall whitening. Day one and day two definitely had more impact.
Today's lipstick: Revlon Super Lustrous Lipstick in 510 Berry Rich
Day 4

OH SNAP! Things are definitely looking better. This recipe is making my teeth look great! Honestly, didn't think I could get my teeth this white without spending time in a dentist's chair.
Today's lipstick: Maybelline Colorsensational in 660 Touch of Spice
Day 5

*Mic drop*
Today's lipstick: Milani lipstick in 34 Violet Volt
After a workweek of using this stuff, I can highly recommend trying this recipe out! I did wonders for my smile. However, I did notice that the whitening was temporary. My smile would get more dull after I ate or drank anything. So this would be perfect before a wedding or big event, however, I don't think I would call it a permanent fix. The hunt for a brilliantly white smile continues.
Images: Emily McClure (9)
