Style

If you don't know this by now, allow me to shout it from the rooftops: You need to be washing your makeup brushes regularly. Dirty brushes are Petri dishes of bacteria, dirt, and oil, which can cause everything from breakouts to infections — and not just on your skin. "Especially with flu season and concerns about [viruses], the last thing you want to do is let your brushes stay dirty," Andrew Sotomayor, an Emmy-winning celebrity makeup artist, tells Bustle. So it's imperative that you know how to clean your makeup brushes properly — and which products to use to get the job done.
As for how often to wash your makeup brushes? Unless you're a professional makeup artist, the consensus seems to be about once every seven to 10 days, a frequency even the American Academy of Dermatology endorses. There are some things to consider when purchasing brushes, too. "Keep in mind that animal hairs dry out from over use and over cleansing, just like human hairs do," Sotomayor says. "Shop for high-quality synthetic bristles made from soft nylon or taklon. Not only will the brushes stay soft, no matter how many times you wash them, these longer lasting fibers are a better investment and they're cruelty-free."
When it comes down to the actual process of cleaning your makeup brushes, there are a few different avenues you can take. Scroll on to find out how, plus, some of the best products to buy that make cleaning your brushes so much easier.
We only recommend products we love and that we think you will, too. We may receive a portion of sales from products purchased from this article, which was written by our Commerce team.
1
Invest In A Washing Machine For Your Brushes
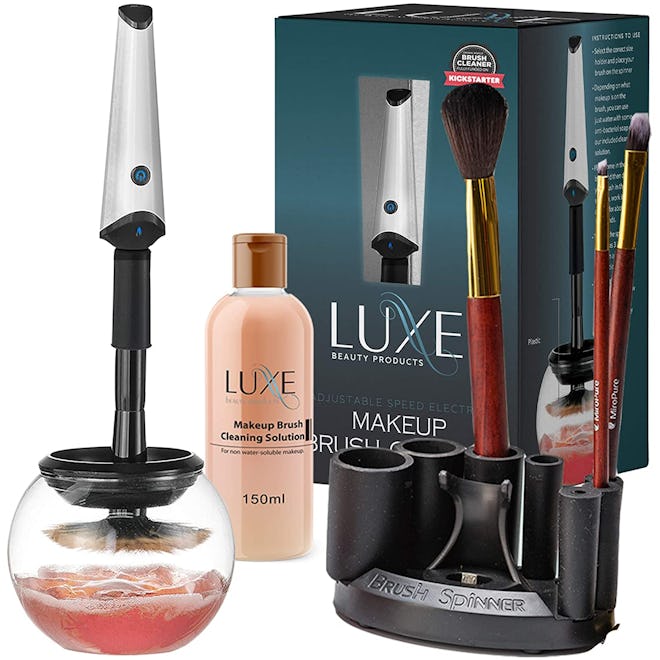
If you're looking for a quick and effective method to clean your makeup brushes, it doesn't get much easier than this clever washer/dryer machine. It comes with everything you need to clean your brushes: the brush spinner, a glass bowl, a splash guard, a charging station, eight rubber holders for brushes of all sizes, and even a bottle of cleaning solution (once you run out of the solution, it'll work just as well with dish soap or baby shampoo).
The process is quick and fuss-free, the instructions are easy to follow, and the kit comes at a relatively affordable price tag at under $50. After you wash your brushes, you can spin them in the machine to dry — so no waiting around necessary. Over 1,000 Amazon reviewers gave this machine a perfect five-star review!
2
Go Manual With This Brush-Cleaning Mat
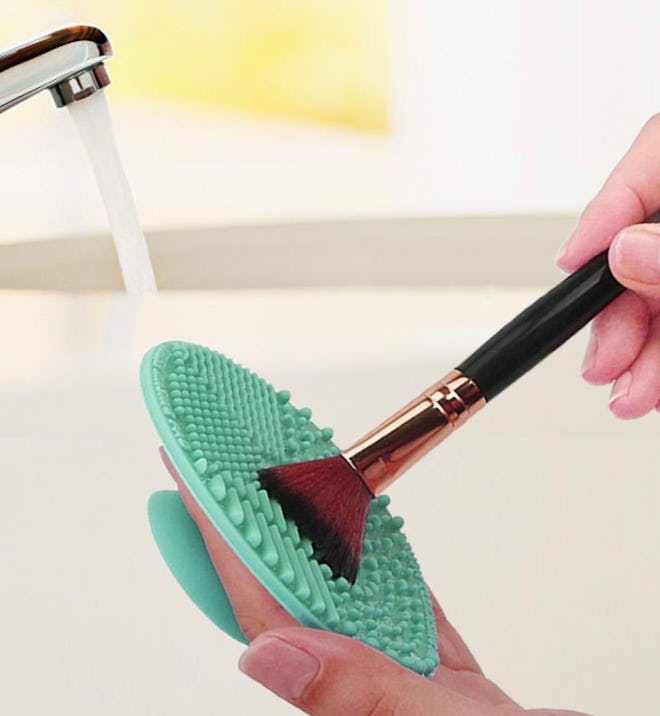
If a full-on machine seems too high maintenance for you, a silicone cleansing mat is a great (and equally effective) alternative. This one has suction cups on the bottom, so it won't slip when you place it in your sink, and has four different scrubbing textures (for cleaning different types of brushes), plus a seventh for rinsing. It's also foldable, so it's travel-friendly and easy to store, too. All you need is your own soap, and you're all set.
3
Make Your Own Cleanser With Dish Soap & Coconut Oil
Whether you plan on cleaning your brushes with a mat, a machine, or in a simple glass bowl, you're going to need some type of cleaning liquid. And luckily, you can create your own — all you need is some liquid soap and a conditioning agent.
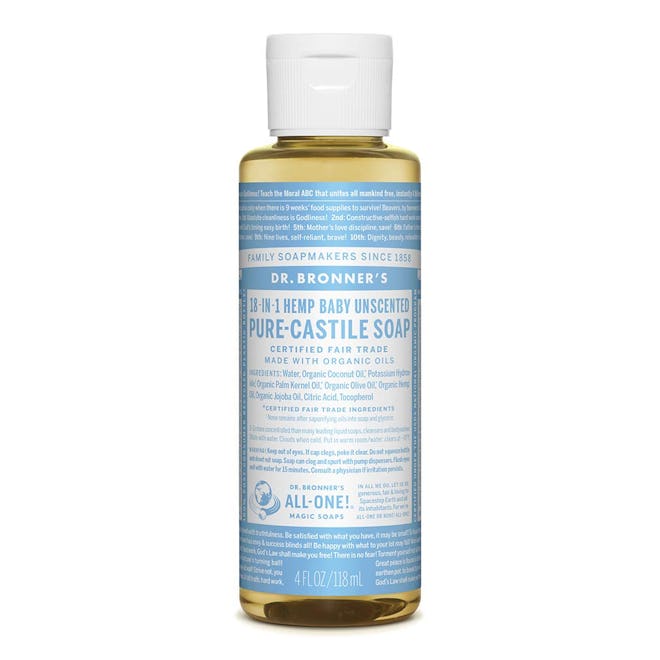
Sotomayer loves using Dr. Bronner's to clean his brushes. "Unlike most petroleum-based-soaps, this natural liquid soap is made from a coconut oil base which gently dissolves most makeup," he says. The unscented formula is a great choice in particular because it's gentle and totally fragrance-free, so it won't irritate sensitive skin types.
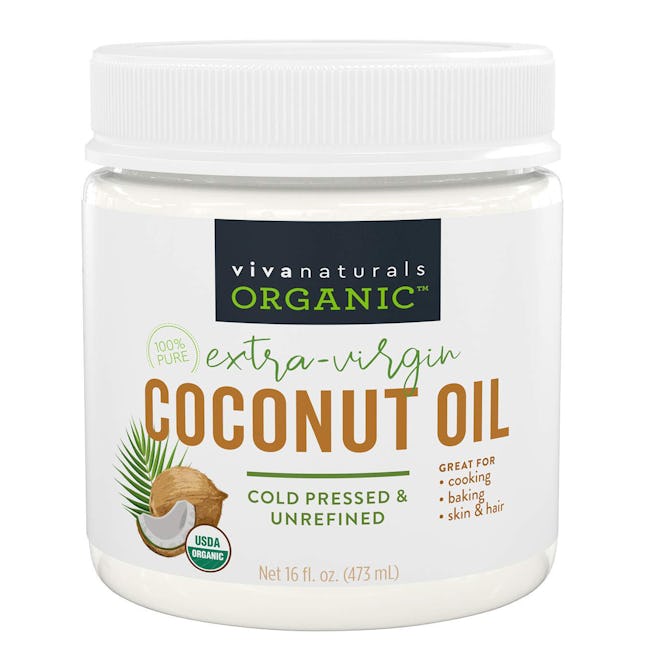
Then, for the conditioning agent, coconut oil, or even olive oil, works great. (Avoid super heavy oils that can clog your pores, like argan oil.) This is so your brushes won't become dried out or damaged. Just make sure to use one part oil to two parts soap so things don't get too greasy; then, pour it all into a bowl.
After giving your brushes a quick rinse, swirl them in your DIY liquid, rinse them under running water, and repeat until the water runs clear. Try not to get the handles, or even the heads of your brushes wet, as that can cause them to break down (instead, just focus on the tips). Give the tips a quick squeeze with a paper towel to remove any excess moisture, then, lay your brushes downwards on a towel to dry. Make sure you never dry them upright, as this can cause the moisture to drip down and further damage your brushes. You can also invest in a makeup drying rack to eliminate the risk of damage altogether — and you'll find a great, affordable pick just below.
4
Hang Your Brushes To Dry On This Handy Rack
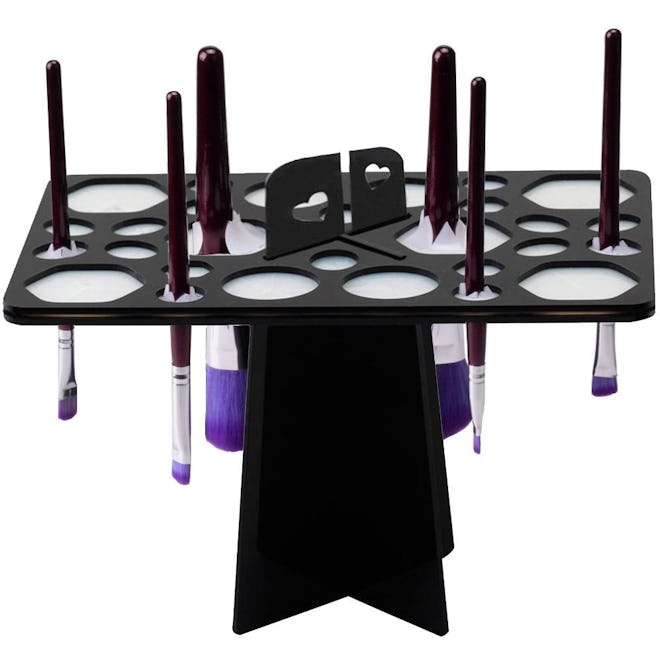
This makeup brush-drying rack will take all the fuss (and potential risk of damage) out of drying your makeup brushes. As I mentioned, water pooling at the base of the bristles can loosen the glue holding the head and handle together, which is why it's so important to lay them downwards, or dry them upside down. So, invest in this $10 rack, and you'll never have to worry again! Plus, when you're done using it, you can fold it up for easy storage.
5
Keep Brushes Clean Between Washes With This Antibacterial Spray
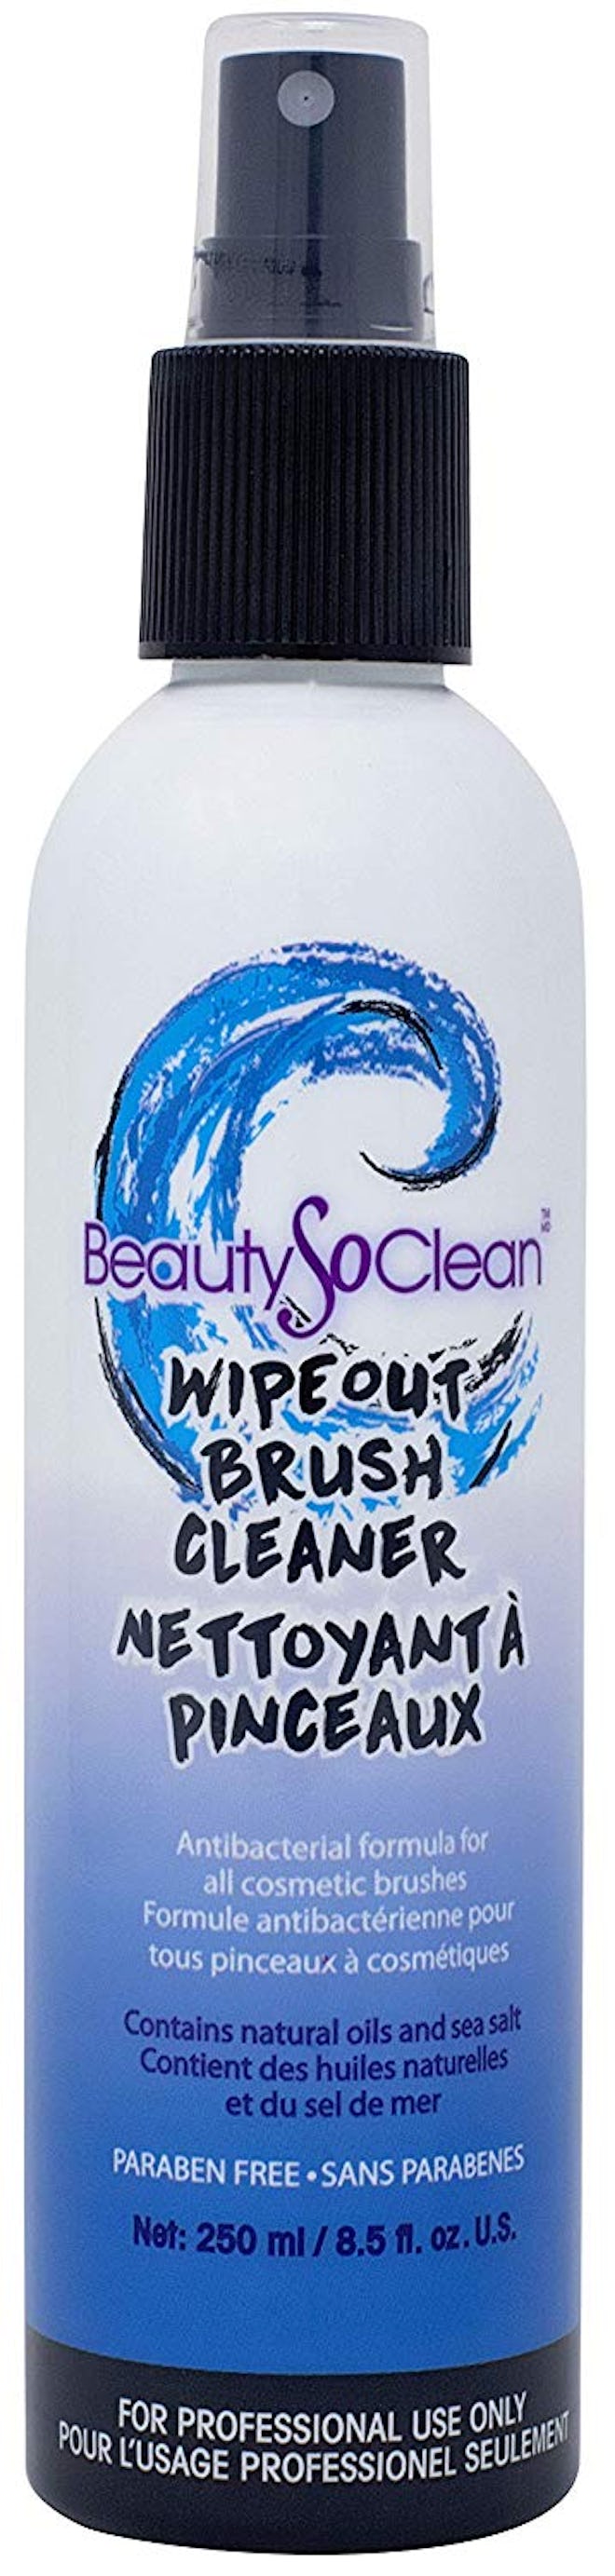
You should definitely be giving your makeup brushes a proper washing every seven to 10 days. But if you use a lot of makeup on a day to day basis, have breakout-prone skin, or are simply a germaphobe, you can keep your brushes clean between washes with a spray, like this one.
Sotomayer loves the Beauty So Clean Wipeout Brush Cleaner for both deeper cleanses and cleaning between clients. "It can be sprayed on a paper towel, and then brushes can be swirled on the surface," he says. "For a deeper clean, pour the no-rinse cleansing liquid into a cup, dip [in] your brush, and then wipe on a towel. Repeat until the brush is totally clean." Beauty So Clean's wash is antibacterial, so it eliminates all of those nasty pathogens upon contact. To break down caked-on makeup, the formula uses sea salt, and it's vegan and cruelty-free, to boot.
