Fashion
Master The "No Makeup" Makeup Look
I've always struggled to master my foundation game, and it's taken a lot of trial and error to find a happy medium. Either I’d find myself with an extremely heavy formula (hello, cake-y skin), or a super-lightweight formula that felt like I was wearing nothing (in a "what's-even-the-point" way, not in an "I-woke-up-like-this" way). This has led to a lifelong hunt for the perfect coverage that’s both supremely lightweight and buildable. Cue NARS Cosmetics and their new Velvet Matte Skin Tint. With one layer of this stuff, you’ll have the same amount of coverage as a tinted moisturizer. Apply a few more and it evens out your skin tone without settling into fine lines or leaving your skin dry. In other words, it’ll still leave your complexion glowing.
And when it comes down to mastering the very popular “no makeup” makeup trend, fresh and glowing skin is key. All you need is a little help from a few other products to really enhance your natural beauty and make you feel more confident than ever.
So in partnership with NARS Cosmetics, we invite you to ditch the heavy liners and lipsticks and embrace a faux-natural look that'll have everyone wondering where you got your glow. Here are the foolproof steps to achieve a flawless "no makeup" look with minimal extra effort.
Step 1: Moisturize & Prime

In order to pull off a #wokeuplikethis selfie, you’ll need well-hydrated skin. Your daily moisturizer should do the trick, but if you’re dealing with super-dry, winter skin, apply a lightweight oil first. After moisturizing, wait a minute or two to avoid pilling. (This is when your skin gets all clumpy from layering one product on top of the next.) Finally, smooth on your primer, which will create an even base for your next step.
Step 2: Apply A Base


Since you want to avoid the caked-on look and seem au naturel, you'll want to avoid heavy foundation. Instead, cover blemishes with something lightweight like the NARS Velvet Matte Skin Tint. Not only does it control excessive shine and have a really soft finish, but it's buildable if you end up needing extra coverage.
Step 3: Highlight

Now comes the fun part: highlight! With your fingers, spread a cream highlighter (which blends more seamlessly into the skin) over your cheekbones, under your brow bone, in the inner-corners of your eyes, at the tip of your nose, and to your cupid’s bow. Makeup artist Tracy Alfajora suggests using a bronze or gold highlighter for darker skin tones and a pearl highlighter for lighter skin tones. And while this may seem like a lot of highlighter, I promise: it creates a natural glow.
Step 4: Blush

Too much blush and you risk looking like a clown, but just the right amount will warm up your complexion and give your skin a subtle flush.
"Using a swirling motion, apply a cream blush on the apples of your cheeks with a foundation brush," advises Alfajora. This will sheer out the blush and give your skin just the right amount of color.
Step 5: Fill In Your Brows

A bold set of brows never goes unnoticed. Using short strokes, fill in all the obvious bare spots with a pencil or powder, depending on your preference. If they end up too dark or blocky, just swipe a spooley brush upward through the hairs to soften the edges.
Step 6: Enhance Your Lashes

All you need is a few coats of mascara — that’s it. Since you're looking for an everyday, luminous look, the finishing touches should be subtle.
Step 7: Amp Up Your Lips

Again, by "amp up," I mean just a little bit of tinted lip balm. A nude or a shade that matches the color of your lips should give you the boost you need.

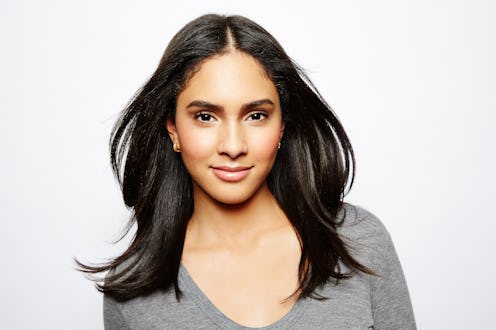
And voila! A fresh-faced “no makeup” makeup look that'll have everyone fooled.
This article is sponsored by NARS Cosmetics .
Images: Lauren Perlstein / Bustle; Makeup: Tracy Alfajora; Model: Thatiana Diaz.
