Fashion
9 Steps For The Perfect At-Home Pedicure
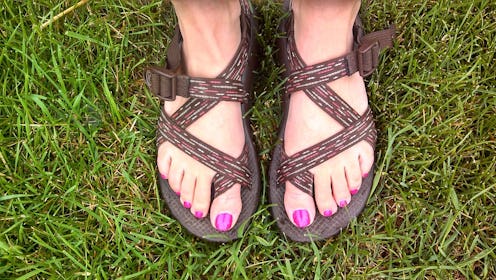
When it comes to getting a gorgeous pedicure, you don't have to head to the nail salon. In fact, Skyy Hadley, celebrity nail artist and owner of As You Wish Nail Salon, tells Bustle an interview that bi-weekly at-home pedicures are the perfect way to get gorgeous feet during the summer months. All you need are the right tools and products to give yourself dazzling nails and healthy looking feet.
When it comes to giving yourself a pedicure, remember to start with clean tools. Hadley suggests avoiding tools like pumice stones as they tend to trap in bacteria. Instead, reach for more hygienic tools like diamond files to get the job done. As always, you can lessen your chances of possible infections by sterilizing or cleaning your tools beforehand. It's always better to be safe than sorry when it comes to at-home beauty routines. Next, be sure to gather all of your tools to the same area so you don't have to dig around for things once you get started. Trust me, trying to find a top coat when your nails are wet can be pretty tricky. Now that you have everything clean and in one place, it's time to get started. Here are nine easy steps for getting a professional looking pedicure at-home.
1. Start Off With A Clean Base

Nail Polish Remover, $2.79, walgreens.com
When it comes to getting a perfect pedicure, you need to start off with a clean base. Remove any old polish or built-up oils using a non-acetone nail polish remover. These removers are great as they aren't as harsh or drying as typical acetone-based removers.
2. Get Buffing

Foot File, $12, sephora.com
According to Cosmopolitan, the best time to scrub away dead skin cells in when your feet are dry, not wet. So, go ahead, and grab your favorite foot file, and get buffing. Be sure to focus on areas that tend to accumulate the most dead skin like your heels and balls of your feet.
3. Start Soaking

Foot Bath, $19.99, target.com
Next, fill a large bowl or foot bath with water and add soothing bath salts. This will help to soften the skin, and prep your feet for further exfoliation.
4. Exfoliate

Foot Scrub, $18, saksfifthavenue.com
During your soak, give your feet some extra TLC by using an exfoliant to slough away any lingering dead skin cells. Hadley recommends paying close attention to rougher areas like your heels and toes in order to scrub away dead skin.
5. Cuticle Care

Cuticle Oil, $8.50, ulta.com
Now, it's time to start caring for your cuticles. Apply a lightweight cuticle oil to the edges of the nails to soften your nail beds. Once the oil has had time to soak in, grab a cuticle pusher to gently push back the cuticle. This will help to give your pedicure a flawless shape. Hadley recommends reapplying the cuticle oil even after your toes are polished in order to make your pedicure last that much longer.
6. File, Buff, & Shape

Nail Kit, $22, sephora.com
Once your cuticles have been pushed back, it's time to shape the ends of your toenails. Start by clipping away any excess (if necessary), and then filing the nail's edge to a smooth finish.
7. Grab A Base Coat

Nail Treatment, $13.95, ulta.com
To prep your nails for color, it's always best to start with a base coat. This will give the color something to stick too, while preventing any staining or yellowing of the nail.
8. Polish

Nail Polish, $10, ulta.com
Next, grab your favorite nail polish, and get painting. I like to use thin layers in order to get perfected look. Start by painting near the edges of your nails and work inward. Once you've painted all ten toes, wait a few minutes for the polish to dry before applying a second coat.
9. Seal The Deal

Top Coat, $12.49, sallybeauty.com
Once your nail color has dried fully, apply a quick-drying top coat to seal in the color and add shine.
Voila – a spa-quality pedicure at a fraction of the price.
Images: Pixabay (1); Courtesy Brands
