I started dreaming of lengthy, strong, afro-textured hair the day I traded in my relaxed hair for the big chop. Once my hair started to grow beyond six inches, I had to start learning some quick beauty hacks for natural curls that I wouldn't have to spend several hours on. After all, being able to leave the house at a moment's notice was one of the many reasons I wanted to go natural in the first place. On days that I do a cleanse and conditioning treatment to my hair, I'm putting in a good four hours of quality time with my curls. These are also the days I seriously consider how adorable I'd look with dreadlocks. Ironically, I'd estimate that having longer, afro-textured hair has eaten up more time in a few years than having relaxed hair did over the course of 15 years. However, thanks to some natural hair hacks I've learned, I can confidently say I still have no regrets, even though there are times I feel like I have a full-time job that pays me in compliments from strangers as opposed to cold-hard cash.
There are quite a few ways to get your natural curls looking fly AF in a matter of minutes, but not all those methods will have your hair looking and feeling hydrated. In fact, some of them can actually cause breakage and dryness. For example, blowing out your hair daily for styling or length can easily cause heat damage and dry locks. I know, I know, it's so tempting, but please don't be a victim. Yes, heat styling is fine in moderation. But you really don't ever need to do it if you don't wish to.
Fortunately for any product or heat junkies out there looking for a quick hair fix on a very bad hair day, I have a few tricks up my sleeves for all hair lengths! Here are my eight favorite styles for mornings when I'm running short on time.
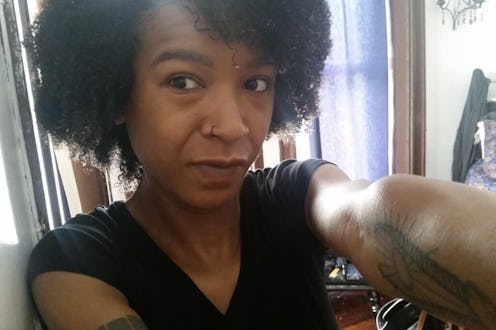
1. The Gentle Afro

This is a style I wear my hair in often. It's also a style that has a little secret: When I'm wearing an afro it means I either got lazy for a few days, slept with my hair out on cotton sheets, and/or my hair is desperately in need of a good cleaning. This afro can be rocked at any length and the only tools you need to pull it off are a spray bottle and a great brush. I use a spray bottle filled with water and avocado oil (a great detangler!) to lubricate my locks. If you have the time and a lot of hair length, you should try to spray in sections to ensure you're really soaking all your strands. Then, I use gentle strokes on my hair with the brush to quickly puff out my hair.
2. The Poofy Braid

For those who tend to keep their hair stretched (with little to no curl pattern), this hairstyle will be great for when that big beautiful hair needs to be put away after a few days of wear. Part your hair to the desired side at the arch of your eyebrow and apply oil and water to the edges to smooth them down. Finger detangle the mid-section and ends so your braid will be smooth and lay down. Next, sweep your hair to one side and braid at the start of your scalp (depending on the length of your hair, you may need to start in the middle of your head.) Take the braid and swoop it underneath your hair and hold with a bobby-pin. Simple, elegant, and super quick.
3. The Messy Curly Bun

There are definitely days when my hair is unmanageable unless I start from scratch with all my cleansing, conditioning, and detangling. And those are usually on the days where I have no time for such a task, because let's face it, the only reason my hair got this way in the first place was because of a time shortage in my life. In these dire times, I give the front of my hair a side-part, similar to the way I did above, and take all of my hair and scoop it on top of my head or in a low poof using an ouchless hair tie. Once it's in a band or scrunchie, you can finger detangle it, gently comb or brush it, or just roll with your current texture — which is what I tend to do.
4. The Bobby Pin Twist

Bobby pins are some of my best friends. They always allow me to quickly get out of my house and still feel good about my hair. To get this look, part the crown section of your hair to the side, and section each side into two. You'll have an upper half on the right and left, and a lower half on the left and right. Next, loosely twist the entire top section of the right until it meets the part on that side. Secure with a bobby pin. Do the same on the left side. Then, take the bottom right section, and make a slightly tighter twist upwards to meet the top right section. Do the same with the left side. Each of the four sections of hear should meet together at the center of your head. This is a great style for those dirty and even nappy hair days because you it involves almost no manipulation. You can be out of the door for Happy Hour in under 20 minutes!
5. The Lengthener

One hack I've learned is that if my hair has shrunk and it's looking slightly dry and maybe a little nappy it only takes a couple hours to add some length. I use this trick often when I sleep away from my house without the protection of a satin bonnet. Spritz your hair with water and then seal in the moisture with your preferred carrier oil, and split your hair into two sections. You can give yourself a middle or side part before you twist each section, staying close to the crown of your head. This is great method because you can use this style to do whatever it is you have to do and when you take it out later on or the next day, your hair will retain a little more length and be more manageable for styling your hair out or up.
6. The Scarf

There are a variety of ways you can utilize a silk or satin blend scarf to keep your hair completely out of sight or even keep your hair out. Since the hair in the front of my hair is less kinky and retains more moisture, I like to scoop up the kinky mess that has become the back of my hair with a scarf, and leave the front of my hair poking through while I put a cute bow or knot in front.
7. The Wet Look

This is usually my last resort and it rarely ends well, but it's a great hack for those with shorter lengths that don't mind a little shrinkage. Get your hair nice and soaked before applying leave-in conditioner. Gently detangle from the bottom to the roots, styling as you protect the moisture in your tresses with your leave-in. This is the ultimate wash-n-go for naturals. Doing your hair in the shower? Everyone enjoys to be about that life.
8. The Middle Part Twist-n-Braid

This is a quick style that can be mastered by even the clumsiest of braiders. Seriously, my braids skills are lacking and even I can make this 10 minute 'do look like it took hours in front of a mirror. Part your hair in the middle from the crown all the way down to the nape of your neck. Section each part and begin twisting where the part meets in the front of your head. I find that under and over will keep the hair laying flat. You don't need to be extremely close to your edges for this look to work. In fact, this style is great because it doesn't pull like a crown braid. Once you've finished the first section, secure with a bobby pin, and do the same on the next section of hair. Once both sides are twisted to perfection, I like to join the twisted sections that fall out together, by twisting and then tucking underneath my hair out of the way.
A true protective style has limited manipulation on the scalp and tresses and prevents the hair from becoming tangled; some of these styles are great protective styles that you can keep in for a few days, others should only be attempted in desperate situations. You know those times where you make a deal with the Hair Gods by begging for a good hair day in exchange to treating your hair better? Hopefully, the styles above answer your prayers on the worse days.
Image: Kristin Collins Jackson (6); Camille Mitchel (2)
