As every '90s girl knows, DIY friendship bracelets are a huge part of summer. Telling someone they were going to be your #BFFAE (and ever and ever and ever) meant nothing unless you proved it by giving them a few braided strings to wear on their wrist. Even though it's 2016, and we're all adults, who says we can't continue to rock friendship bracelets as a summer statement piece?
Luckily, our favorite DIY kit company MakersKit has put together a fun, easy braided friendship bracelet kit to help you kill time at the pool and show your friends how much you care about them. The "Honestly WTF Braided Bracelet Kit" (how amazing is that name) comes with four colors of waxy string (pink, orange, blue and olive green), a selection of round gold beads and three massive gold spikes. You can use any combination of these items to personalize your bracelet, and make them for as many of your #BFFs as you want.
I tried the kit (literally while killing time at the pool) and was very excited with the results — mainly because I now have a thank you gift to give to my best friend who's hosting me at her house for the fourth of July this weekend. Take a look at these few easy steps, and then try it for yourself!

Before you start, you need a pair of scissors. I tried to do all the scissors work with my teeth and a set of keys... and it was a mistake. Trust me on this one.
Step 1

Once you've picked your color (I went with pink), cut the waxed cord in half. Fold each of the remaining two pieces in half, then tie them together in a knot leaving about a quarter of an inch of a loop. You only need three strands (you're going to be braiding) so snip off one of the four strands — you won't need it. Because I didn't have scissors, I left the piece on and figured I would cut it off later. I wouldn't recommend this though, because it gets really confusing later on.
Step 2

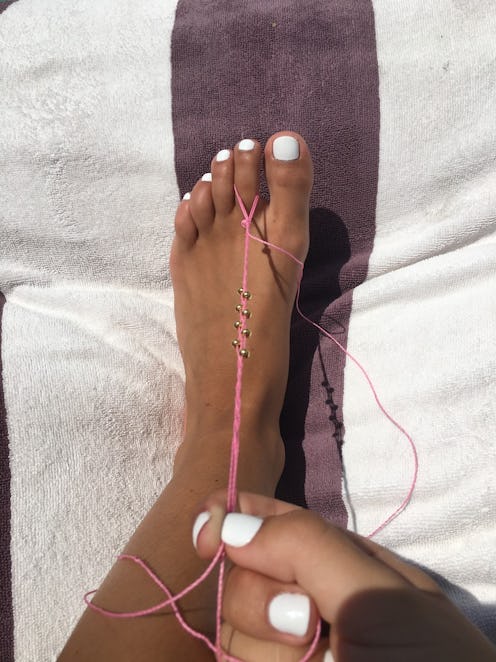
Tape the loop to a flat surface, or if you're like me and want to feel really nostalgic about the '90s, tie the loop around your toe. Then, start braiding!
Step 3

After you've braided about an inch, put a bead on the outer left string and push it all the way to the front until it reaches the braid. Then move the strand to the middle to continue braiding.

It gets kind of tricky here, so be sure to hold the bead in place on the left side.
Step 4

Now do the same thing on the outer right strand. You're basically braiding while adding a bead to alternating sides every time you move the strands.
If you want all the beads to stay on one side instead of alternating (if I were to make another bracelet, I would probably stick with one side because it seems a lot easier) just keep putting the beads on the same side that you started with (though this doesn't mean you're putting them on the same strand — the outer left strand will change every time because you're braiding).
Step 5

... Keep going until you have the desired amount of beads on the strand. The waxed cord makes the beads stay in place, but you can move the strands around to get them spaced out the way you want. I would recommend keeping them extra tight (tighter than I did!) so they don't slide around when you put them on your wrist.
Step 6

Once you feel like your bracelet is blinged out to your liking, keep braiding without the beads until the complete braid is long enough to fit around your wrist.
Step 7

If you'd like, you can also add one of the cool gold horns that come in the kit. If I were to do this again, I would pop the horn on sooner, because when I put the bracelet on my wrist I couldn't see it, which kind of defeated the whole purpose.
Step 8

Wrap the bracelet around your wrist, tie the ends together, and cut off any excess.
Step 9
Make another one for your best friend!
Here is the official tutorial from MakersKit's website, in case you need a little extra explaining. Happy braiding!
Images: Zoe Weiner
