When I'm slingin' pizzas on the weekends at my serving job, I like to keep as much distance between looking like the help and looking like myself as possible. Which is why even when I'm heading to serve someone a full-bodied, red wine on our 90 degree patio (WHAT ARE YOU EVEN DOING), I try to keep my nails decked out with some seriously fancy styles. Since I try to stay on a budget, I can't be bothered to shell out extra dough for getting my nails done by a professional each week — and let me be frank, that polish does not last three days before it starts chipping like someone was clawing at it for several hours. When I do my own nails, not only can I take pride in my creativity, but I can fill in those unavoidable gaps. Doing minor touch-ups while I read my book before bed or catch up on Pretty Little Liars makes it look like my nails stay did.
Would you believe that as someone who owns over 100 different shades of nail polish, I'm still always bored with my options? Fortunately, an adorable red-headed, nail-pro taught me some great techniques to painting fancy nails. This means I can get a diamond mani in the comfort of my own home with no additional cost.

I'm going to keep it extra real and tell you that I have the world's shakiest hand. No, this is not scientifically proven, but even holding a camera for a selfie results in the phone shaking out of my unstable hand. The best part about DIY nails? You can go wild with polish all over your hands. Do a simple clean-up by dipping a Q-tip in nail polish remover and cleaning up the discrepancies. My rule for nail painting? Always shower AFTER a nail sesh; this will allow you to get any smudges surrounding your nail beds. Obvy, you'll need to wait for that polish to try completely before jumping in any water.
Step 1: Prepare the Nail Bed

Da Vinci didn't paint the Mona Lisa on a dirty, misshapen canvas, did he? Of course not, and since a unique diamond mani is JUST as important, we must begin with buffed, filed, and clean nails. Remove your ridges as best as you can to avoid further chipping in the future and file according to your style.
Step 2: Apply a Base Coat

There are so many reasons why you should apply a base coat that I can't possibly list them all here. I will just say this: Ain't nobody tryin' to put a ring on a permanently stained, yellow nail-bed. My personal fave is Sally Hanson's Double Dry and Base coat, but if I have some extra time to spare, I'll give myself a nice nail-bed treatment with castor oil and peppermint to ward off brittle, weak nails.
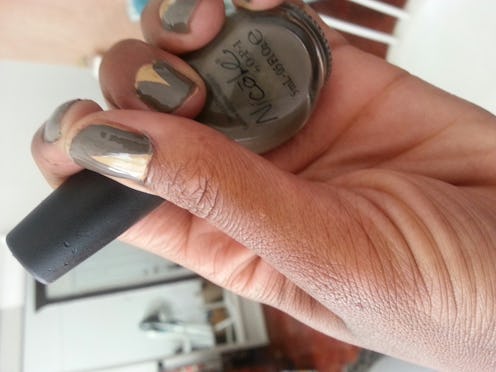
Step 3: The First Layer of Paint

Choosing the first layer of nail polish is a bit of a science. First and foremost, you'll need to commit to a color that will not protrude through the top layer of nail polish, usually this has more to do with the quality of your nail polish and less about the actual color. For instance, black bottom layer and white top layer works wonderfully. Once you've spent at least 30 minutes at minimum debating on color selection, apply the chosen color over your base coat. This amount of contemplation time will ensure you haven't made a grave mistake and also allow your base coat to dry completely.
Step 4: The Waiting Game, Part I
The first coat of paint is not the most important, but you still want to wait until it's fully dry before you start getting crazy adding designs. Typically, to pass the time, I like to play Candy Crush as it takes little effort and I don't run the risk of smudging my nails before I've made any real headway. Reading a book is risky, but if you consider yourself an expert page turner, I say go for it. This is also a great time to blast Le Tigre and dance around your room in front of the fan and really turn up. Only for 20 minutes though — you don't want to be doing this mani all day.
Step 5: The Second Layer of Paint

The fun and games are over and it's time to get serious. Not only will you need to pick a second coat of paint that will really wow the crowd, or one that you won't be sick of tomorrow, you will also be choosing which hand to begin with. When it doubt, go neutral with a black, grey, or brown shade of polish. Throw all reservation about which hand to do first out the window, because they will BOTH be done eventually. I start with my left hand because I'm right handed and want to save the real mess for later.
Start at the left corner of your cuticle and paint upward, covering more space as you reach the top. Then repeat on the right side of your nail, creating a triangle shape for the first layer of paint with the second. Repeat on all 10 fingers.

Step 6: The Waiting Game, Part II
Repeat Step 4, only better, because you really don't want to start all over again because of a little reckless smudging, do you?
Step 7: Apply a Top Coat

This is the last and most important step of your new nail game, simply apply a durable top coat on nearly dry nails to avoid severe chipping. My faves are Seche Vite and OPI's Rapid Dry Top Coat. Both of these dry super fast and although you'll need to be careful in what activities you partake in for the next 30 minutes or so, you can at least go to the bathroom with ease after only 10 minutes.
Images: Giphy; Kristin Collins Jackson
