Cheri Alberts of the food blog The Watering Mouth does many impressive things with her culinary skills — but I would argue that by far her most notable are her creative and tasty edible shot and shot glass recipes. Just in time for the holiday season, she’s got a new one for us: Peppermint shot glasses made out of those little round peppermint candies you see all over the place in winter. Is anyone else dreaming of filling them with some sort of creamy, chocolate-y, boozy concoction? Because the hint of peppermint that these candy shot glasses will undoubtedly lend them sounds like absolute heaven to me.
Alberts has supplied yet another video demonstrating how to make these gorgeous little shooters; her blog post also goes into a little more detail about the trials and tribulations she faced while creating them. Originally she had thought to try using candy canes, but after a few… shall we say, unfortunate disasters, she realized that the round peppermints would suit the recipe much better. Works for me.
A few notes: First, don’t let kids make these, although feel free to fill them with non-alcoholic drinks for the little ones when they’re done. They’re just a little too dangerous to allow tiny hands near while they’re being made. Also, for the love of all that is boozy, make sure whatever liquid you put into the shot glass is the same temperature as the shot glass itself. Otherwise it will crack, and then you’ll end up with a big, sticky, peppermint-scented mess. Not that there isn’t a time and a place for big, sticky, peppermint-scented messes… but this is not one of them.
Here’s the general idea in seven pictures; head on over to The Watering Mouth for the full recipe, and scroll down to watch the video:
1. Melt the Peppermints

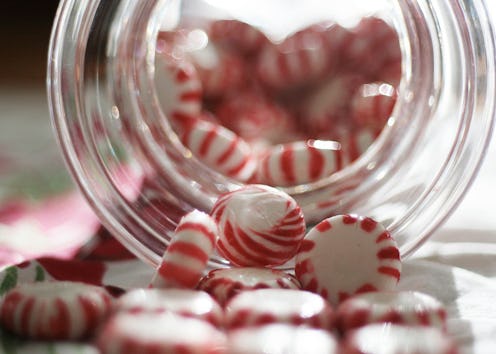
Preheat the oven to 300 degrees, lay a few pieces of parchment paper on a cookie sheet, and set the unwrapped candies on top. Make sure you arrange them in the flower-like groups of seven you see here — when you bake them, they’ll melt into circular sheets. Then stick ‘em in the oven and bake ‘em for about 10 minutes.
When you take them out of the oven, they should look like this:

2. Form the Glasses

Here’s where it gets a little tricky, because time is of the essence. Remove the peppermint-covered sheets of parchment paper and let them cool for about 10 seconds. Then peel the peppermint circles off the parchment paper and stick it right on top of an overturned shot glass:

The sheet will naturally start to droop around the shot glass, but you’ll probably have to do a little pushing and prodding with your fingers, as well:

It helps if you have something nearby to cool your fingers down while you do this, because those sheets of melted peppermint will be really effing hot. Alberts cracked open a beer and used the bottle to keep her hands cold (and also for the purposes of drinking, because beer); you could probably also just use a few ice cubes wrapped in a paper towel or something, but where’s the fun in that?
After about 10 seconds, the peppermint should be cool enough that you won’t be able to mold it like clay anymore. Remember that whole thing about working fast? You’ve got about 20 seconds total from the moment you remove the peppermint on the parchment from the cookie sheet to the moment the glass becomes set.
3. Remove the Peppermint Shots from the Actual Shot Glasses

They should just slide right off.
4. Fill, Shoot, and Enjoy!

Again, make sure the liquid you’re using is the same temperature as the cup to avoid cracking — but other than that, no rules apply. Bottoms up!
Watch the full video below, and head over to The Watering Mouth for more details, tips, and tricks to pull these suckers off. Oh, and be sure to check out the rest of Alberts’ recipes while you’re there — they're well worth it!
Images: kfkirsch1/Flickr; The Watering Mouth/YouTube (7)
