Fashion
How To Make Incredible Tattoos From Dried Flowers

The temporary tattoo fad you may recall from elementary years past has re-emerged from the nostalgic graveyard and is now on trend, thanks to Beyonce and the cool kids at Coachella this year. If you really want to embrace the ~artsy~ lifestyle, why not try to learn how to make temporary tattoos yourself? Because, listen: We're not talking about the same tattoos we remember sticking to our skin and rubbing on with a damp wash cloth in the 90s. This is 2015, people! We'd like to think we've evolved from our ten-year-old selves and are a tad more original than that — not to mention a bit crafty thanks to the billions of DIY projects scattered around the web.
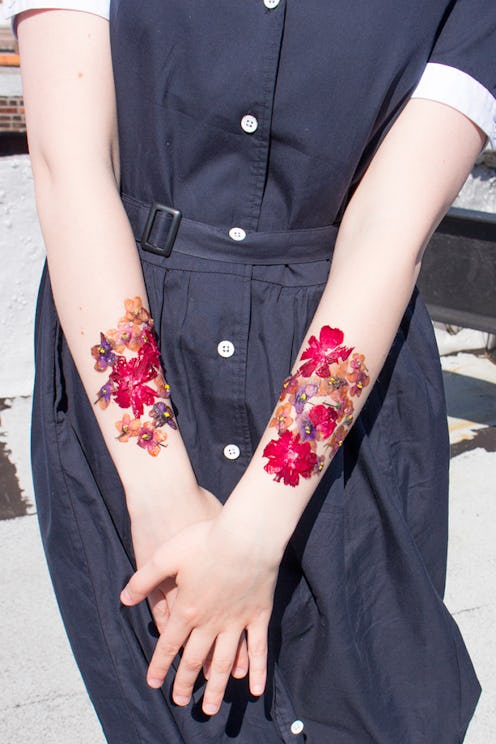
Fashion blogger Emily Geraghty of That Cheap Bitch was recently inspired by this flash trend. As a result of her fascination with temporary tatts and a serious Pinterest binge (of course), she decided to try her hand at a dried flower temporary tattoo made from scratch — and I'm stoked to be able to share with you her brilliant and beautiful creation. All you need is a few minutes of your time, about four or five colorful flowers of your choosing, a microwave that will sufficiently run for 30 seconds, eyelash glue (or Vaseline if you're taking temporary to an extreme), and hairspray.
Step 1: Gather ye rosebuds while ye may.
Or any flower you find suitable for your original tattoo. For her tattoo, Emily picked out a beautiful variation of pink and dark purple African violets and red carnations.
Step 2: Press them real good.
And fast! Traditionally, pressing flowers could take up to three weeks, and by that time this flash fad may have passed. In order to speed up the process, Emily first placed her flowers upside down on a paper towel resting on a plate. On top of her flowers, she then pressed another piece of paper towel, covered by a second plate. Popping the plate in the microwave for 30 seconds, Emily’s flowers were sufficiently dried.
Step 3: Transfer over ASAP.
DO NOT, I repeat DO NOT leave said flowers on said plate to dry before peeling off to relocate flower petals. Given time, the flowers will dry to the paper towel and make it very difficult to peel off. That being said, immediately peel petals off of the paper towel, and lay them face up on a new surface.
Step 4: Get temporary tatted.
Adhere your flower tattoo by applying eyelash glue to the desired area and gently pat pedals in place. Seal your non-ink with hairspray for extra hold. If you’re looking for even more temporary of a temporary tattoo, skip the eyelash glue and apply petals onto Vaseline!
Step 5: Shamelessly show off your (non)ink!
You've officially been temporary tatted, and with such beautiful body art you'll want to share with the world. Instagram that baby, head out to a music fest near you, brag about it while you take advantage of this spring weather at a BBQ or just kicking back with your buds. You'll want to take full advantage of this DIY over and over again. Guaranteed.
Want more sweet DIYs? You can follow Emily on Facebook, Pinterest, and Instagram.
Images: Courtesy Emily Geraghty