Fashion
Make A Necklace Organizer From A Backyard Stick
Trendy statement necklaces have been all the rage the past couple of years, but personally I'm more of a thin, dainty necklace kind of girl. It is this penchant that led me to perfect the DIY jewelry holder. (Because, you know, thin necklaces get tangled.) I just love how delicate the thinner necklaces are, though, and they make perfect accessories to go along with tees and jeans. I mean, ever feel like your outfit is too plain? All you have to do is add a cute necklace!
Over the years, I've collected and hoarded lots of these dainty necklaces that I've grown to love — but it's such a pain when my necklaces tangle together. Not only is it annoying and frustrating, but it's also a huge waste of time. I can think of 1,000 better things to do than to be crouched over trying to untangle necklaces that decided to become one.
But here's the thing: I actually solved my tangled-necklace-woes with some crafting supplies and a sturdy stick found in my backyard. I decided to make a wooden jewelry holder last summer, and it was ridiculously easy (plus, super chic for my bedroom). This DIY necklace organizer is the perfect mix of organic shapes and industrial metals. The twine and the stick's natural curve and texture offer the organic element, whereas the gold wire and gold metallic color give off a trendy vibe.
Step 1: Gather Your Materials

Materials Needed: Stick from backyard, twine, gold jewelry wire, gold metallic spray paint, nails, hammer.
You can find all of these materials at a local crafting store like Michaels. Make sure to find a stick that is sturdy enough to hammer nails into.

Step 2: Prepare Stick

Once you've selected a good stick, peel the bark off of the stick so that you're left with a smooth surface. If the bark is tough to remove with your hands alone, you can use sandpaper or a blade to help.
After removing all the bark, spray paint the stick with the gold metallic spray paint. I did two coats and waited five minutes in between, and then let the paint dry overnight.
Step 3: Hammer Nails Into Stick

When your stick is dry, it's time to hammer in the nails. This part might be difficult for those of you who aren't familiar with how to use a hammer, so make sure to be extra careful or ask for help.
The nails will work as the hooks for your necklaces. I put the nails in about an inch apart from one another — I eyeballed the measurements, but you can mark the stick to help you place the nails evenly. My best advice here is to conduct this step on a surface you don't mind ruining (i.e., not the hardwood floors in your house). After you're done hammering in the nails, it should look something like this:

Step 4: Wrap With Gold Wire


Before wrapping the stick with the gold wire, you can re-spray paint it to make the nails gold and to touch up where the paint may have chipped off from the hammering. Take the gold jewelry wire and start wrapping it around the stick all the way down to the other end. You can secure both ends of the wire by tying it off. The gold jewelry wire will give your jewelry holder more texture, luster, and shine.
Step 5: Add Twine

Get a two-foot long piece of twine and tie it using a double-knot to both ends of the stick. The twine will be used to help hang the necklace holder on a hook or nail on the wall. After securing the twine onto the stick, find a place on a wall for it to hang either using a nail or a removable hook.
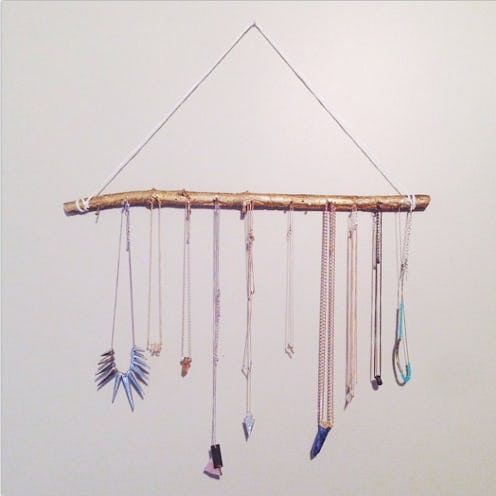
Step 6: Hang Your Necklaces
Ta-da!
Images: Helena Kim
