Fashion
A Step-By-Step For Getting Shailene's Braided 'Do
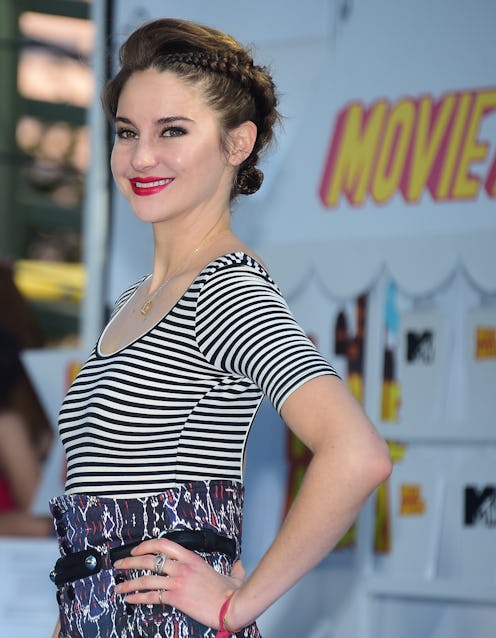
Not only is trailblazer Shailene Woodley outspoken about her beliefs and viewpoints, but she's also a trailblazer in the sense that she isn't afraid to experiment with beauty. Shailene Woodley's braids, shaggy pixie, and bold lip colors are totally unique — and she rocks them all with complete confidence.
As a fellow pixie-wearer myself, I'm still completely obsessed with her look from the MTV Movie Awards. Shailene paired a bright red lip with the coolest side-braid of all time, proving that you can have short hair and still play around with fun hair styles and updos. As someone who is also a fan of wearing red lips and switching up my short 'do, I realized I had to try this braided style for myself.
I will point out that Shailene has a lob at this point while I have a long pixie with an undercut. So she definitely had more hair to work with than I do, but I think I managed to make it work. As you'll see, the awesome thing about this style is that almost anyone can do it, whether your hair is long or short, and even if you don't have the most amazing braiding skills. Keep reading for the step-by-step tutorial!
1. Start with dirty, dry hair.
Dirty hair helps this style a lot. If your hair is clean or very fine, you may want to dirty it up a bit. Oscar Blandi Pronto Texture & Volume Spray ($24, sephora.com) will give your hair the perfect tousled volume.
2. Separate a chunk of hair on the side of your temple.

Divide that large piece into three smaller pieces.
3. Braid the strands together.

Put each piece underneath the other, pulling the braid away from your face as you go. Keep it tight to your head, but don't worry about the occasional loose strand.

4. Tie the end of the braid down at the back of your head.

Remember to allow the braid to get thicker and messier at the back.

(Maybe not that messy though; the picture above demonstrates why you'll want to tie up the ends of the braid, which I did shortly after.)
5. Brush the rest of your hair up and away from your face.

Hold the ends of the braid in place with bobby pins. This above photo is what it looks like from the front.
You can play with some volume here. Tease your hair upwards in the front and allow a few stray wisps to escape.
Here's how it looks from the non-braided side (I brushed my hair over my undercut to make it closer to Shailene's style):

If you have longer hair, you can copy Shailene and put the rest of it back in a low bun against your neck.
Remember that the end result is supposed to be messy and imperfect. Mine certainly came out that way — and I really liked it.

I imagine this would look even better with blonde, red, or light brown hair, since the braid will stand out more.
To finish it off, you can add a light-hold hairspray if you want; I like to use Lea Journo Voila Finishing Spray ($28, sephora.com). It will keep everything in place without making your hair stiff or sticky.
Don't forget to add the red lipstick and a striped shirt, and you're good to go!
Images: Kelly Dougher
