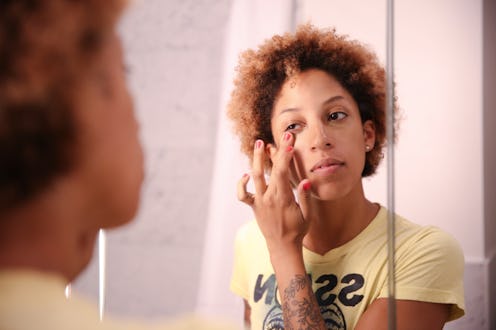
For the most part, putting on makeup is an art form. You can experiment with eyeshadow, go crazy with contour, and test every lipgloss, stick, and shade imaginable until you find something you like (then you can try something totally new the next day). But there's one product that stays pretty steady, regardless of how much you change around the other stuff: foundation. But did you know there's a right way to put on foundation?
Even if your skin is glowy and radiant on its own, foundation helps provide an even more flawless base on top of which the rest of the magic of makeup can happen. Think about it this way: Foundation is the blank canvas on which the real art can take place. It evens out your skin tone so that all of the fun stuff (like your eyes, lips and contouring) can go on as smoothly and beautifully as possible. It may not be the most "fun" product to deal with, per se, but there is still some technique behind getting it right. Apparently, your go-to method of squirting it into your hand and smearing it all over your face isn't doing your beauty routine any favors.
To make sure your "blank canvas" is as smooth and protected as possible, here are seven tips (writer tested and approved) for how to put on your foundation the right way .
1. Find Your Perfect Match
Nars All Day Luminous Weightless Foundation, $49, Sephora.com
Most of us have learned this the hard way, but trying to find the right shade of foundation through the bottle under the fluorescent lights of the drugstore aisle simply doesn't work. Check out Sephora's Color IQ, which uses some major technology to help you find the perfect shade (it's way over my head, otherwise I'd try to better explain) or at the very least test a sample before you buy anything from the drugstore. Always try them on your jawline for best matching results.
2. Always Cleanse & Moisturize First
MAC Mineralize Time Check Lotion, $45, MacCosmetics.com
We all know that applying makeup to dirty skin is a major beauty "don't," but it's equally as important to layer on moisturizer before your foundation, too. Moisturizer acts as a barrier between your skin and the makeup, which prevents it from seeping into your pores and causing dirt buildup and breakouts.
3. Don't Underestimate The Power of Primer
Smashbox Iconic Photo Finish Foundation Primer, $36, Sephora.com
One of the most valuable lessons I've learned in adulthood (besides the fact that I cannot drink tequila) is that primer is the #1 best weapon for achieving a flawless face. Not only does it help your makeup last longer and stay on throughout the day, but it also diminishes the appearance of your pores and makes foundation go on more smoothly. Different types of foundation give different finishes to the final product — some are more matte, others more luminescent — so figure out which works best with your foundation of choice by testing the combo of the two on the back of your hand.
4. Apply With A Brush
Benefit Cosmetics Foundation Brush, $24, Sephora.com
Resist the temptation to dive fingers-first into your foundation and invest in a tool that will help you apply it the right way. Not only does brush application help the makeup go on more smoothly, but it helps avoid transferring acne-causing bacteria from your hands onto your face. Mix your foundation on the back of your hand, then start painting with the brush from the center of your face (aka your nose) and blend outward toward your chin and hairline for most even results.
5. Blend With A Sponge
The Beauty Blender Original, $20, BeautyBlender.com
When it comes to applying foundation, the a makeup sponge is your best friend (there's a reason why every beauty blogger, vlogger, and editor is completely obsessed with it). Once you've put your foundation on with a brush, use the thicker end of a beauty blender (any sponge you have will work, I'm just personally really into this one) to blend in small circles all around your face to get rid of any unwanted lines and make you look totally even.
6. Don't Forget Your Neck
Estée Lauder Double Wear Stay-in-Place Makeup, $39.50, Ulta.com
Thanks to my own total ignorance of the importance of this step, my face and neck were two completely different colors from the ages of 14 to 22. When blending your foundation, bring the sponge all the way down to your collar bone to ensure that there isn't an awkward, obvious line between where the makeup ends and your skin begins.
7. Finish With Concealer
NYX Cosmetics Hi Definition Photo Concealer Wand, $4.99, NYX.com
For some reason, most of us were taught to put concealer on before our foundation, which I can now say with full certainty is the wrong way to do it. Concealer should be the final step in your skin-perfecting routine, because otherwise you risk wiping it all away while you're blending your foundation. Apply concealer with a brush (not with your fingers! especially on zits!) and if you need to, use a sponge to blend around the edges — the pointed edge of the beauty blender works best.