Life
How To Use The Afterlight App To Edit Your Next Stand Out Instagram Photo
The perfect Instagram picture doesn't just happen. It's thought out, curated, captured, and then edited to completion. And while there are hundreds of editing apps out there, including the filters that Instagram provides itself, one of the more popular choices is Afterlight — and now the updated version, Afterlight 2. But simply paying $2.99 and downloading it isn't enough to launch you into Instagram influencing. If you want to become a picture pro, knowing how to edit a photo in Afterlight will help you get there.
The app is all the buzz because of its personalization options, including the ability to create your own filters and even create a common and consistent aesthetic between all your pictures. It also allows you to use its pinch zoom feature to get into the finer details of your photos and make precise edits, according to the app's site. Although there are hundreds of small editing actions like this that you can take and mess around with on the app, there are some general beginners' tips that will help you get started on your next hit post.
There are several Afterlight features that can help you tweak a photo until it meets your standards. These include Revert, Adjustment Tools, Filters, Dust & Light Leak Overlays, Crop & Transform, and Frames & Text, according to Picxtrix.com, a website for photography tips and tricks. And while some of these tools are more straightforward — Crop & Transform allows you to crop the photo or flip it in any direction you want and Frames & Text lets you to add a border and words to your photo — other sections require a little more practice.

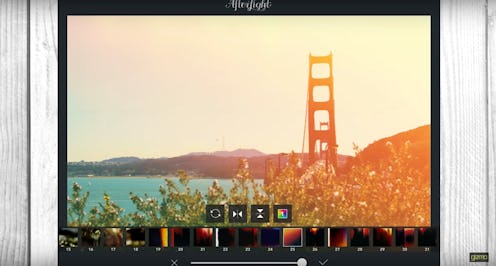
The Adjustment Tools (think Highlights, Tint, and Grain) are where most of the photo editing magic takes place, according to Picxtrix. You begin using these tools by first selecting the photo you want to edit, and then clicking "USE" in the bottom right corner. Then you can select the "Adjustment Tools" on the menu screen by clicking the second icon to the left at the bottom of your screen. Then you simply click on whichever features you want to play with.
With 15 total editing options, you can choose which techniques you want to use and then change the intensity of them with the sliding bar that appears. If you like what you see, you click on the checkmark on the right hand corner, and if you decide you no longer want to use that edit, you just exit out by clicking the X, according to Picxtrix.

If you want to use one of the preset filters, head over to either Filters or Dust & Light Leak Overlays (the third and fourth icons on the bottom of the screen when you first select your photo) and you'll be able to choose between different effects. And if you want to start creating Instagram posts that are more consistent, Picxtrix explains that you can click on the Fusion button and then continue to edit your photo. Afterlight's Fusion will keep track of the edits you use so that the next time you're editing a photo, you can use the same edits and work toward an Instagram feed that feels cohesive. The Dust & Light Leak Overlays similarly let you use a filter over the entire picture, but are meant to add a warm or vintage effect, according to PicxTrix. You can work with these the same way you do the Adjustment Tools.
Afterlight's tools are simple to use, but still end up providing professional-looking results. With even a beginner's effort at editing, you'll be Instagram ready in no time.
This article was originally published on
