Style
I Turned Markers Into Nail Polish Remover Pens

If there’s one beauty tool I’m dependent on, it’s nail polish corrector pens. I'm constantly coating my cuticles in various shades of red and pink when I paint my nails. So, anything that helps make the process a little easier is a serious lifesaver. That’s why I decided to try and make my very own nail polish corrector pens from things I had lying around the house. As always, YouTube is full of beauty DIY videos and when I spotted one which showed you how you can turn old markers into my regular beauty-buy, I knew I had to give it a go.
I used YouTuber xoJahtna's video as inspiration. In the clip, she effortlessly turns Crayola pens into nail polish correctors using three tools: markers, tweezers and nail polish remover. Sounds simple, right? It is. Not only are the pens excellent at getting rid of any mess you make whilst painting your nails, but they’re also incredibly easy to make and, best of all, cost effective.
Rather than spend $10 on one pen, the only thing I had to buy for this DIY was nail polish remover, which cost less than $5 in a drug store. It goes a long way too. I managed to turn a whole pack of markers into corrector pens and still have remover left in the bottle afterwards. Here's how you can also save some bucks and turn your old markers into nail polish corrector pens.
What You'll Need
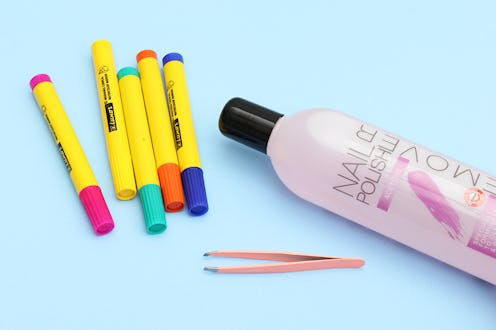
To make your own DIY nail polish corrector pens, you'll need the following:
- Markers
- Tweezers
- Nail Polish Remover
1. Remove Bottom Of The Marker
Start by removing the bottom of your marker pen. For some pens, this can be quite tricky so you may need additional tools like a pair of craft pliers.
2. Pull Out Ink
Once you've removed the bottom of the pen, remove the ink filter of the pen. I'd recommend using a pair or tweezers and/or wearing rubbing gloves for this, as it can get messy.
3. Run Under Tap
Next, hold the ink filter under a cold tap. The aim here is to wash out all the ink inside until it's completely clear.
4. Empty Filter
After you've washed out all the ink, the filter of the pen should look something like this.
5. Run Tip Of Pen Under Tap
Now, run the tip of the marker under the tap. Again, hold it there until all the ink is washed out.
6. Empty Tip
It's slightly tricker to wash all the ink out the tip of the pen, but don't worry too much if there's still a tiny bit left in it. As long as the majority of it is clear.
7. Fill With Nail Polish Remover
Once the tip and ink filter are washed out, place them both in a bowl. The tip of the pen should be easy enough to remove from the casing, but if not, you can leave it attached and put the whole pen into the bowl.
Pour a small amount of nail polish remover into the bowl, making sure the tip is covered. Next pick up the filter and fill it up with nail polish remover, like I'm doing in the GIF.
8. Put The Filter Back Into Pen
Now, put the pen back together. Slide the ink back into the casing.
9. Put The Bottom Back On
Don't forget to attach the bottom of the pen too!
10. Try It Out
It's as easy as that, you now have DIY nail varnish corrector pens that'll help you fix any messy edges. They're saving a few bucks, putting all the old markers in your drawer to good use and helping you create a stress-free manicure.
Images: Emma Matthews