Whether you want to go textured and beachy or smooth and voluminous, there’s an iron for that. To help you find the best one for you, your hair type, and the look you’re going for, four editors with different hair textures and lengths gave a few top-selling Conair styling tools a twirl. Ahead, their honest reviews, real tips and tricks, and gorgeous before and after photos to boot.
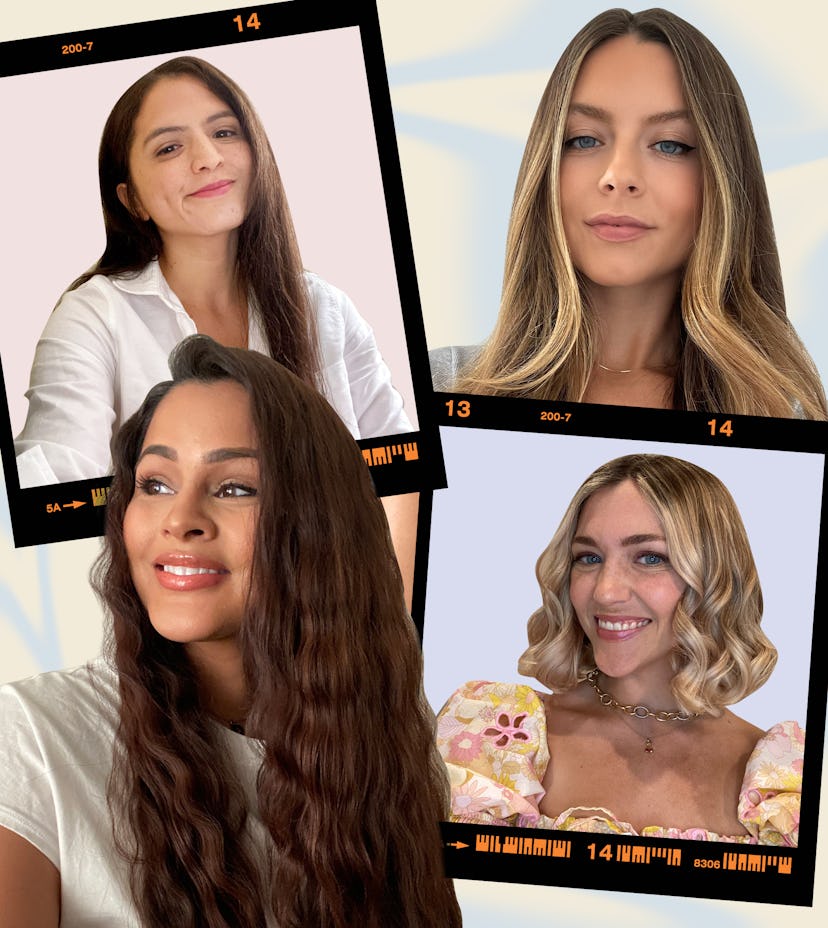
Irma, Associate Beauty Director, Branded
This oval brush and dryer-in-one delivers shiny, bouncy movement without frizz or the sore arm that comes with juggling a separate round brush and blow dryer. “Starting at my roots, I dragged the brush through big sections of hair, rotating it as I worked it down for that classic blowout look. I used the high heat setting because I’ve got a lot of hair, and it took about 20 minutes to get the job done —pretty impressive considering the length and thickness!” says Irma. “That day, the bounce dropped a bit like most blowouts do, but after a few days without washing, my hair still looked pretty amazing.” FYI: This blowdryer uses a special smoothing ionic technology that helps tame frizz and fuzz, but without any residual flatness. You can also remove the brush from the base and clip on the included volume attachment, which is meant for blasting your roots before or after your blowdry for extra lift. Or, to lock in even more luster, use it on the cool air setting.

Shyema, Senior Beauty Editor, Branded
“Okay, this is much simpler to use than you’d think!” says Shyema, who has long, medium-thick, and wavy hair. “All you have to do is clamp the barrel down on small sections of hair for about 4 seconds, starting at the roots, then, depending on how long your hair is, work your way down to the ends—no wrapping or twisting involved! The iron is super lightweight and easy to maneuver, which is a nice bonus, and the aesthetically-pleasing rose gold barrels made it easy for me to see exactly where I was clamping.” An impressive 30 heat settings allow you to choose an intensity that’s best for your hair type, but to avoid damaging strands, try to keep it to a medium setting. “I felt like a mermaid!” says Shyema about her finished waves. “The waves were really beachy and fun. I’ve never used an iron with barrels that small in diameter, so the curves were really defined, which I loved.”

Elly, Senior Fashion Editor, Branded
Before we start, let’s all take a moment to appreciate that this curler is totally cordless. Yup. It’s also the most low-effort, because it does all the work for you: You essentially feed it small sections of hair and it spits out a perfect spiral every time. Elly, who has shoulder-length, medium-thick hair, with a bit of bend, shares her experience: “I first secured a half-ponytail’s worth of hair on top of my head before getting to work on the bottom half. Using the curler’s ‘left’ curl setting, I curled the left side in small sections, holding each piece of hair in the curler for about five seconds, then went back and did the opposite on the right side. I set the curls with a light spritz of hairspray before moving on to the top half of my head. This time, I alternated the direction of each curl using the ‘mix’ setting, which I think creates a more natural look. When I was finished with my whole head, I misted the ends with more hairspray, then finger-combed everything out with a drop of hair oil.”
Hot tip: The longer you hold the hair in the curler, the tighter the curls will be, so keep that in mind when you’re using this one. You can also expect about 60 minutes of styling time before you have to recharge the iron again. We’d recommend charging it at night so it’s all ready to go for you in the morning.

Jackie, VP Branded
This tool is like if a paddle brush and a blow dryer had a baby, delivering sleek strands with just a few passes. A consistent stream of heat blows out of the flat brush, allowing you to straighten and smooth as you dry, but the brush attachment is removable for days you want to rough dry (i.e. you can use it as a traditional dryer).
“My hair is fine in texture, but I have a lot of it, so I rarely blow it out or straighten it because it's a lot of work,” says Jackie, who has collarbone-length 3A curls. “This tool really solved one of my main pain points when blow drying my hair, which is juggling the brush and dryer and reaching the back of my head. Also, the brush meant that I could direct the air only on sections I was actively working on. During a typical DIY blowout, I find that wayward hot air has a way of adding unwanted volume to random sections and means I have to rewet and redo those sections.” Because Jackie has an abundance of curly hair, she found that dividing it into multiple sections—she split up the top and bottom layer of her hair, then further broke those out into smaller sections—and tackling smaller pieces that way was most effective. “On each chunk of hair, I slowly ran the brush from top to bottom until it was completely dry before moving on to the rest. As a blowout novice, I can say that this coaxed my curls into glossy, blown-out, in-control hair with minimal fuss, so it’s definitely my new go-to styler.”

