Fashion
I Tried A DIY Maple Syrup Face Mask
When it comes to skincare, face masks are one of my favorite things to use to keep my skin looking and feeling amazing. Usually, I'll just wash and moisturize my face, but every few days I wear a face mask to make that extra effort to take care of my skin. This is when I like to try out DIY beauty and skincare products, like DIY maple syrup face masks, to find new and fun ways to achieve clearer skin. It's also a great way to use more natural (and versatile) ingredients, especially if you're on a budget. For this week’s fun experiment, I decided to use my beloved pancake topper — maple syrup — to see if it's good for more than just breakfast foods.
While I’ve attempted (and sometimes failed) many face masks using oatmeal, avocado, or honey, I had never thought of using maple syrup as a key ingredient. Did you know that maple syrup is great for skin? I definitely didn't! Similarly to raw honey, maple syrup has antioxidant properties and can help fight wrinkles, dryness, redness, and inflammation. This is great for skin like mine that is in a strange wintery dry, but also still oily state.
I attempted to make not one, but two different kinds of face masks using maple syrup. Here's what it looked like.
Mask #1: The Aloe-Vera Facemask

Ingredients:
- Bowl
- Spoon
- 1 Tsp. of 100% maple syrup
- 1 Tsp. of aloe vera gel
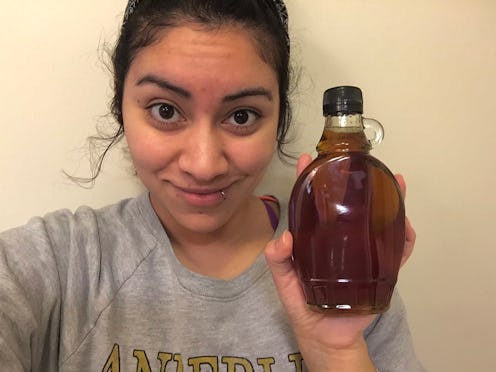
I decided to find a simple recipe for my maple syrup face mask, and was pleasantly surprised to see a lot of DIYs that included this tasty ingredient. Many recipes called for using fruit, like strawberries, or substituting it for honey. However, the most popular face mask recipe consisted of only one other ingredient: The favorite sunburn solution, aloe vera. Just like maple syrup, aloe vera also has antioxidants, can help fight wrinkles and improve the skin’s elasticity. The similarities between both ingredients made them seem like a great combination, so I headed out to buy some pure 100% maple syrup to slather onto my face.
Unfortunately, I underestimated how difficult it would be to get from step 1 to step 2, as I could not open the maple syrup bottle to save my life. I spent an hour attacking the bottle’s plastic cap with knives, pliers, and scissors and event texted my dad asking how I could somehow twist this measly-looking cap off of the jar.

In a display that fathers can often be superheroes, the minute my dad got home, he twisted it off in three seconds flat. After coming to terms with my weakness, I mixed up a small batch of my maple syrup facemask.
The Attempt

Making the fac emask was super easy. It didn’t involve cooking anything or a bunch of ingredients, so I was very happy that I made it without failure. But even so, I found that the consistency of the mixture was extremely runny and watery. Having never seen someone make this or done it myself before, I wasn’t sure if this was because of the aloe vera gel that I used or if that was how it was supposed to be. Nevertheless, I went with it anyways after washing my face.
The recipes all mentioned waiting around 15 to 20 minutes before rinsing it off, so I left it on my face while I cleaned up my room. As the mask “hardened,” I found my eyelid sticking whenever I blinked. That's maple syrup for ya!
The Verdict
The minute I rinsed off the mask, however, my face felt extremely soft and moisturized. Knowing my skin is usually dry and rough these days because of winter, it was nice knowing that I could rehydrate my face with such a simple DIY mask. Yay!
Mask #2: The Oatmeal Milk Facemask

Ingredients:
- Bowl
- Spoon
- 1 Tbsp. of warm milk
- 1 Tbsp. of maple syrup
- 3 Tbsp. of finely grained oats.
- Microwave
Seeing how successful the first face mask had been, I decided to try out the second most common DIY maple syrup face mask. It included oatmeal and warm milk, ingredients I was 100p ercent sure I had stocked in my kitchen. The maple syrup, oatmeal, and milk face mask required a few more steps than measuring and mixing, but nothing that couldn’t be done with a microwave, so I was sure I could do it without issues.
For those of you that don’t know, oatmeal is a great skin product. Oatmeal helps with skin dryness, itchiness, and inflammation. It is also what people have used for centuries for chicken pox, poison ivy, and other weird skin ailments. Likewise, milk is also great for skin by being a good cleanser and moisturizer. It is especially helpful for those with sensitive skin.
The Attempt

After gathering all the ingredients, I quickly measured out 3 tablespoons of oats and attempted to ground them up as small as possible in a food processor. I did this for about 20 minutes and realized that my processor was sucky, so I decided to leave it be and mixed up half-powdery, half-chunky oats with my warm milk and maple syrup. The consistency of the mixture was sort of runny like the aloe vera face mask (and made me hungry since I hadn’t had breakfast yet).
The watery consistency made it really hard to apply to my face, and it kept dripping sticky oats down my neck and onto my shirt. However, I was grateful that this time my eyelids weren’t sticking whenever I blinked and that the face mask quickly hardened, so I could sit somewhere and not worry about leaving a mess behind.
The Verdict
Once 15 minutes had passed, I washed it off in the sink and found that my face was super soft and moisturized. It didn't make my skin feel squeaky clean, but as if I had just massaged it with amazing lightweight cream. To top it off, the redness I had from a few spots had drastically minimized!
Final Thoughts

After trying out both masks with maple syrup, I am definitely a believer in using this simple ingredient again in other cool DIY beauty projects. There are hair mask recipes using maple syrup, as well as other maple syrup face mask recipes, like one that uses strawberries. The best part (besides clear, glowy skin)? The maple syrup itself doesn't cost too much (I paid $5 for a bottle).
If I had to choose between the two face masks, I would probably go with the aloe vera one simply because it was the easiest to make and clean up afterwards, even though I feel like the oatmeal one made my skin more moisturized. I'm a pretty lazy person, so something that does the job fast is my kind of product. I did use a moisturizer afterwards, but I could immediately tell that my face was not as tight and dry as it had been before, even without putting the moisturizer on.
If you're struggling with dry skin, you should definitely consider making this face mask!
Want more beauty tips? Check out the video below, and be sure to subscribe to Bustle’s YouTube page for more hacks and tricks!
Images: Vanesa Pacheco
