Fashion
How To Make A Multi-Purpose Lip & Cheek Stain
In 2015, multi-purpose lip and cheek stains soared to popularity, and it’s easy to see why. Unlike blush, the products are typically packed with enough staying powder to survive those sticky spring subway journeys. But how do you make your very own stain?
While stains can help you achieve a rosy warm glow, sometimes money’s tight and buying any kind of beauty product will feel like a splurge. If you’re a newbie to stains, like me, then you also probably want to try out a product a few times before you invest in the real deal. That’s why I decided to hunt down a kitchen-friendly recipe with a little help from online resources like YouTuber RCLBeauty101's simple-to-follow tutorial.
Prior to this DIY, I’ve had very little experience using stains, and have always been slightly skeptical of them. My skin is fairly dry and I have acne scarring on my cheeks, which made me think that the product would be tricky to blend out and only make the blemishes look even more noticeable.
I’ve also been slightly put off by the colors of many stains. As someone who rarely delves into bright cheek hues, I had no idea where to begin. Coral pink? Apricot orange? I didn’t want to spent a precious $30 on a shade that wouldn’t suit me.
Thankfully, having a go at the DIY helped me address those fears. It gave me confidence in applying the stain and I was able to work out what hue suited my complexion best. Cherry red, in case you were wondering. Here’s how you can do the same.
What You’ll Need
To make a spring cheek and lip stain, you’ll need the following:
- Food Coloring
- Lip Balm
- Glycerin
- Mixing Bowl
- Cotton Swabs
- Microwave
- Empty Jar/Container
1. Pour Glycerin Into A Bowl
NOW Vegetable Glycerin, $6, Amazon
Start by pouring glycerin into a mixing bowl. This can be bought from most major supermarkets or Amazon. For this DIY, I measured everything by eye. The amount of ingredients you use won't affect the texture or quality of the stain. All it will impact is the amount of product you produce.
2. Add In Food Coloring
Wilton Gel Food Coloring, $3, Amazon
Next, add a small amount of food coloring into the bowl. Don't worry, it won't permanently stain your skin! For this DIY, I created three different batches of stain: red, orange, and pink. This would give me an idea of what shade would suit my skin tone best.
As I wanted my three stains to be fairly subtle, I didn't add too much dye to the mixture. But if you're feeling a little more daring and want a bold in-your-face shade, pour in as much as you like.
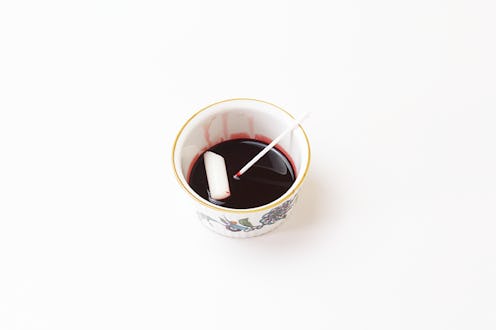
3. Mix It Together
I recommend using a cotton swab to mix the dye and glycerin together. As it's smaller than a spoon, it will allow you to create a smooth mixture that's free from any lumps and bumps.
4. Test On Hand
Once you've finished mixing the ingredients together, test the stain out on your hand. This will give you a first glimpse of the color you've produced.
If you're not happy with the shade, you can always pour in more food coloring. Also, if you feel the texture is too thick or sticky, add a few drops of water to thin it out.
5. Add In Lip Balm

Art Naturals Lip Balm (Pack Of 6), $9, Amazon
To make the stain multi-purpose, you next need to add some form of lip balm. This will help nourish and hydrate your lips. For this, I used a basic ChapStick. But there are plenty of alternatives.
For those who want an extra strong color, you can use tinted balm to boost pigmentation. Alternatively, if you wanted a stain with a little more shimmer, use a glittery balm.
6. Pop The Bowl In The Microwave
The next step involves popping the mixing bowl into a microwave for 30 seconds. Ping! Once the balm has melted, carefully remove the bowl and use a fresh cotton swab to stir the stain together. You can then spoon it into an empty jar or container.
7. Apply The Stain
Voilà! The stain is ready. Once it's cooled down, you can apply it. I found the easiest way to do this was with my fingers, as it allowed me to thoroughly blend the product. That said, you can also use a blender or brush. Whatever you feel most comfortable with.

The first stain I created was this soft pink. Overall, I was really impressed with how the color turned out. It's subtle enough to be worn on a daily basis and definitely gives my usual makeup routine a feminine spring twist.

My aim for the second stain was to create a wearable orange. It didn't quite turn out the way I wanted. The shade doesn't really suit my complexion and looks more like jaundice than a hue I'll be wearing in the future. It's a pass.

Last but not least, the third stain I created is this red color. Ding, ding, ding, we have a winner. Not only did the stain give my cheekbones definition, but the color also works well with the warm tones in my foundation and concealer.
And there you have it. You can now make your own affordable lip and cheek stain. Not only will it save you a buck or two, but it should also give you a feel for what stains look like when applied. What color will you be opting for? Red? Orange? Pink?
Want more fashion and beauty tips? Check out the playlist below, and be sure to subscribe to Bustle's YouTube page for more hacks and tricks!
Images: Emma Matthews
