Fashion
Cure Summer Acne With A DIY Cupcake Face Mask
For many of us, beach season is looming. But while the excitement of lounging in the sun and the possibility of afternoon picnics remains sky-high, the unwelcomed arrival of summer acne isn’t. I’m prone to June and July spots, which is why I’ve been on the hunt for a face mask that will not only help my zits, but that is also heaps of fun. Cue the cupcake mask.
A top seller at LUSH, the mask is ideal for those with naturally oily skin as it draws out impurities and dirt. It’s also great for people like me who face issues with greasy pores in the warmer seasons thanks to things like high-coverage makeup or bangs.
Since my skin is fairly dry for the rest of the year, I didn’t see much of a need for investing in the original buy. It would only be stored in the back of my fridge until the sun comes out to play, which in England is very little. That’s why I attempted to hunt down an affordable DIY alternative. Of course, the internet was on hand to help. Using Tanamontana100's YouTube video and various other tutorials as inspiration, I was able to create a recipe that works wonders.
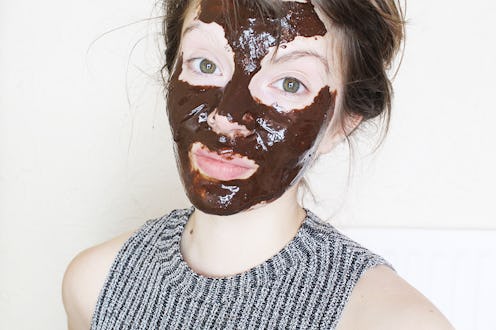
Not only does the mask resemble LUSH’s, but it works just as beautifully. It instantly made my skin feel smoother, visibly unclogged my pores, and, most importantly, got rid of the oily patches on my T-zone. Here’s how you can do the same and bid farewell to summer zits.
What You'll Need
To make your own cupcake face mask, you'll need these ingredients:
- Unsweetened Cocoa Powder
- Healing Clay
- Honey
- Vanilla Extract
- Glycerin
- Mixing Bowl
- Spoon
- Storage Container
1. Spoon Cocoa Powder Into Bowl
The main ingredient you’ll be using to make the face mask is two heaped teaspoons of cocoa powder. You can use standard store-bought powder, just make sure it’s unsweetened and preferably organic. Cocoa will help draw out impurities and clean your pores.
2. Add Half A Spoonful Of Honey
Next, add half a spoonful of honey. The sticky-stuff is used in many face masks as it’s a natural humectant. This means it works on moisturizing skin and ensures long-lasting hydration. After all, although the aim is to make oily skin drier, you don’t want too dry.
3. Pour In Healing Clay
Once you’ve done that, add two heaped teaspoons of healing clay. I’m using Aztec Secret Indian Healing Clay, which can be purchased from Whole Foods or Amazon.
Aztec Secret Indian Healing Clay, $10, Amazon
The base of LUSH’s original mask is Rhassoul mud. But I don’t imagine you want to start rooting around in your garden. Healing clay is a cheaper and more accessible alternative. It will work with the cocoa to tackle dirty pores and can also be used for body wraps, clay baths, and even insect bites.
4. Add Vanilla Extract
If you want your face mask to smell like cupcake, add a drop of vanilla extract. This step is optional, but definitely contributes to the LUSH-like properties.
5. Pour In Glycerin
For the mask to actually stick to your face, you’re going to need to add some form of binding agent. For this, I used glycerin as it easily creates a sticky texture that’s spreadable.
6. Mix Everything Together
Combine all the ingredients by mixing them together. When you initially start to stir the mask, you'll find that the glycerin will clump the ingredients together. Simply add in more of the liquid until you create a consistency you're happy with.
7. Apply The Mask

Now, the only thing left to do is apply the mask. Just like you would a normal face mask, apply a thick layer of the product on your pores. You don't have to use it on the whole of your face. Just pay special attention to any areas of your skin that are particularly greasy, like your cheeks, T-zone, or jawline. Leave the mask to set for 10 to 15 minutes, before washing it off with warm water.
When you remove the mask, you'll be left with oil-free skin. Alongside looking and feeling great, you'll also likely be in store for a boost of confidence and reassurance that the ingredients will be hard at work tacking those inflamed summer spots. Now, who's up for a poolside dip?
Want more fashion and beauty tips? Check out the playlist below, and be sure to subscribe to Bustle's YouTube page for more hacks and tricks!
Images: Emma Matthews
