Fashion
How To Fix A Chipped Gel Manicure At Home
We all know that chipped manicures are the worst. However, when the polish is a gel formula, the problem gets that much more frustrating. Instead of heading to the salon to fix the damaged color, however, why not try fixing your chipped gel manicure at-home? According to manicurist Jin Soon Choi in an interview with InStyle, fixing your own gel manicure isn't that difficult. In fact, in just a few simple steps you can completely revamp the look of your mani. No salon or nail tech training necessary.
Read more: 20 Glitter Nail Designs To Copy For An Eye-Catching Mani
Now, we all know that gel formulas are absolutely sensational for long wearing manicures. Two whole weeks of flawless looking nails? Sign me up! However, when you do start to notice chipping, Choi suggested to get buffing. Handy tools like buffing blocks are perfect for this step as they help to buff down the edges of the chip to ensure a smooth transition between new coats of polish and the old. As someone who chips their own nails often, I can attest to just how important the buffing step is when fixing a gel manicure. The block helps to smooth the surface, so no one can tell where the old polish ends and the new begins.
Once the nail is buffed, you get the ball rolling on reviving your tired manicure. Wondering what else you need to do fix a stubborn chips? Here are seven steps for fixing a mangled gel manicure at-home for a fraction of the price it would cost at a salon.
1. Start Buffing

When it comes to filling in chipped gel polish, start by buffing the entire nail with either a buffing block or nail file. According to LuluAndSweetPea.com, buffing the entire nail helps to break the seal on the polish that was created by the top coat. By taking away this seal, the new polish can better adhere to the old polish.
2. Level The Edges

Next, focus your nail file on the edges of the chip. Leveling off the edges of the chip helps to create an even base for the new polish, according to InStyle.
3. Prime The Nail

Like with any manicure, you want to make sure that your exposed nail has a base coat before applying polish. This same thought pattern should apply to chipped areas of the nail as well. In fact, YouTuber DeeVine DeeZine suggests a primer or gel bonder to the nail prior to applying more gel polish in order to give the new polish a long lasting base. Allow the nail to dry fully for 30 seconds before going on to the next step.
4. Apply Polish

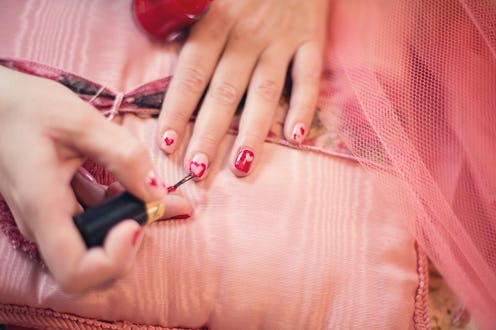
After your base coat as fully dried, it's time to start applying your gel color. WhatTheGelNails.com suggests working in thin layers to create the most natural looking finish. Just be sure to let each layer dry fully before applying another coat. You don't want to any air bubbles peaking through your newly revived polish.
5. Take The Extra Step

If you're worried that the gap between your older gel polish and your newer layers is still too visible, then LuluAndSweetPea.com recommend applying a coat of polish to the entire nail. This will help to give a more seamless finish to the nail and further disguise the chip.
6. Apply A UV Gel Top Coat

Seal the entire nail by applying a UV gel top coat from the base of the nail all the way to the free edge. This top coat will help to further protect the polish, while adding shine back to the nail.
7. Wipe Away Any Excess

Once your top coat has dried, finish off your manicure by wiping away the excess tackiness with alcohol or a gel cleanser. A simple swipe with a soaked cotton ball will do and will make a world of difference to your manicure.
See? Fixing your own gel manicure at-home is super simple, and not-to-mention, free.
Images: Pixabay (1)
