Style
What You Need To Know About Using A Beauty Blender
There are a multitude of beauty sponges on the market, and many of them have rave reviews and low price points. However, the Beauty Blender will always hold the spot as the OG sponge, but how exactly do you use the Beauty Blender to get the most flawless finish?
For those who are accustomed to flat top kabuki brushes (like Sigma's iconic F80) or using their fingers to apply foundation, the process of using a Beauty Blender may be a bit confusing. While we've all seen those triangle sponges, this beauty product is markedly different from those old school tools. With its egg-shape, expandable size, and aqua-activated technology that helps prevent product absorption, there's a reason why people still swear by the official Beauty Blender despite dupes on the market.
With its technology, the sponges promise flawless-looking application, but part of getting the airbrushed look comes from knowing how to use it. Good news: Bustle reached out to the professional makeup artist at Blushington as well as the brand itself to bring you the best tips on how to use a Beauty Blender. So if you're over using brushes or your hands to apply your makeup, here's how to use the Beauty Blender to step up your foundation game according to experts.
1. Prep Your Skin
Blushington makeup artist Ilana Aulov explains that getting flawless skin with a Beauty Blender begins before you even start using the sponge. She tells Bustle, "Let me start by saying, flawless skin starts with the right caring & preparation. Always make sure your skin is loved by getting the right products for its type. Some products do not interact well with others (chemically) or aren't a good fit for the skin types. This can be an obstacle for constituting a flawless skin."
Before you start using your sponge, take care of your skin.
We only include products that have been independently selected by Bustle's editorial team. However, we may receive a portion of sales if you purchase a product through a link in this article.
2. Wash Your Sponge

Because the Beauty Blender comes in direct contact with your face and is used wet, it's so easy for it to harbor bacteria and other nasties. Which is why it's extremely important to wash your Beauty Blender, ideally, after each use.
Aulov explains that cleaning is imporant, but you should also make sure you're using the correct soap. She says, "Some soaps foam too much or not as much, and that's playing with the sponge elasticity. (and hygiene)."
Global trainor for Beauty Blender Mark Chi echoes Aulov explaining that he likes to clean his sponge daily to help eliminate germs (and since it has to be damp anyway). He says, "I personally love to wash my Beautyblender first thing in the morning before I use it. The Beautyblender has to be used damp regardless. This way, not only is my blender damp and ready to go, it’s also clean and sanitary."
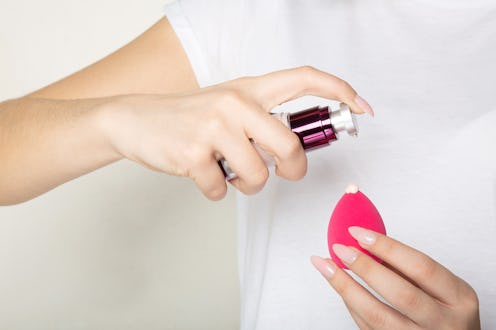
3. Dampen The Sponge (But Not Too Much)
Both Chi and Aulov wash their sponge before use, and that leads to the next tip: wring out your Beauty Blender. Both the makeup artist and global trainer explain that while your sponge should be damp, it should be far from soaking wet.
Aulov tells Bustle, "As we understand, washing [the sponge] will be the first step, but the texture of the sponge is also very important. If the sponge is too dense, it will leave marks on the skin. You want it to be as 'airy' as it can be, meaning damp and lightweight."
4. Bounce The Sponge

The key to applying makeup with the Beauty Blender is using a bouncing or stippling motion instead of a wiping or sweeping motion. You can apply makeup to your face or the Beauty Blender first, it doesn't really matter. I've chosen to start by swiping some foundation on my face with my fingers before going in with the Beauty Blender. To blend in the foundation all over my face, I'm using the broader side as it covers more surface area to help speed up the process.
Aulov echoes the Blender's diverse method of application telling Bustle, "The Beautyblender is very versatile, you can apply the foundation with it by stamping the sponge on the face with the foundation on it or blend the application that already got done on the face with a fresh cleaned sponge."
5. Use The Sides Strategically
To blend in smaller, more concentrated areas like concealer under the eyes or around the nose, use the pointed side of the Beauty Blender. Remember to use the same bouncing motion as before to really help press the product into the face.
Chi uses targeted application methods to get the most from his sponge. "There really is no right or wrong way to use it (unless you are using it dry, then you are using it wrong)," Chi tells Bustle. "For me, I like to the use the rounded end of the Beautyblender for larger areas of the face, like for applying foundation. I use the pointed end for more targeted makeup application, like blending concealer under the eyes or for covering a blemish. And I use to side of my blender to apply highlighter and to blend out contour."
6. Don't Drag It

While Beauty Blender is able to be used in a variety of ways, there is one cardinal rule. Don't drag it across your face. Chi explains, "Remember to never drag your Beautyblender to blend your makeup. Always use a bouncing, dabbing, or patting motion for the perfect airbrushed results."
7. Use It To Smooth Streaks
If you aren't totally sold on giving up your foundation brush or fingertip, the tool can still be a great investment for your makeup routine. Aulov says that the Blender can be used to remove any sort of streak marks left over if you still want to use a brush.
8. Less Is More

You may think that a sponge would absorb your product, Chi explains that's actually not true. In fact, he recommends using less foundation than normal.
When switching from a brush to a Beautyblender, most folks have the tendency to use too much makeup," he tells Bustle. "Airbrush makeup is weightless and traceless. To achieve that same effect, start by using half the amount of makeup you normally would use. You’ll be surprised how far your Beautyblender will take your makeup."
9. Remove Cakiness
If you just can't follow Chi's advice and end up applying too much makeup that results in a cakey look, Aulov has you covered with her next tip. She explains to Bustle that a clean Blender can help decrease cake face.
"You can use the sponge for sheering down either product on the skin or taking off 'cakeiness' (a buildup) by taping the area with a little moisturizer soaked into the beautyblender," she says. "This will leave a beautiful finish to the skin."
10. Dry It

Again, the wet state of a used Beauty Blender makes it a nice environment for, say it with me: bacteria and mold! So to make sure that it can dry properly and quickly, don't shut it away in a drawer or container. Chi says, "Don’t forget to always let you Beautyblender air dry in a well ventilated place." The top of the jar that the Beauty Blender comes in is actually a great place to let it rest so that it can air-dry. You'll know it's dry when you come back the next day and it's magically sitting inside the jar again. Yeah, it's kind of cute like that.
This article was originally published on November 27, 2015.
This article was originally published on
