Fitness
Why Air Squats Are The Ultimate Lower Body Move
The lowdown on the staple exercise.
The air squats exercise is a go-to move in pretty much every workout class and fitness routine ever. But it isn’t always clear what the benefits of an air squat are, beyond how it works the glutes — especially since it’s so simple and requires no equipment. While a squat is obviously a great lower body exercise, there’s way more to it than meets the eye.
For a quick definition, the air squat is a bodyweight exercise that uses a parallel and neutral hip-distance or shoulder-distance foot stance, says Sarah Steele, a Pilates instructor, NASM-certified personal trainer, and founder of SteeleSculpt. “You can think of it as the building block for all other squat exercises,” she tells Bustle, like the sumo squat, split squat, or weighted squats. That’s why it’s recommended to nail the air squat first if you plan to do more complicated moves.
An air squat effectively works glutes, hamstrings, and quads, making them the essential lower body exercise, Steele says. “Your core and calves also help out to keep you balanced and in proper alignment,” she adds. And because a squat is functional — meaning it mimics movements you do in everyday life — it ends up being beneficial for everyone.
The functionality aspect is why Mallory Fry, a master coach for Row House, recommends working your squat muscles regularly, especially as you get older. Add the air squat exercise to your routine and you’ll find it becomes way easier to get up out of a chair, squat down to pick things up, and so on. It’s also an ideal way to squeeze in some cardio. Because the legs muscles are so big, Fry says they require more oxygen and blood to use, and thus raise your heart rate as you lower up and down.
Read on below for more info on the all-important squat, including how to do it.
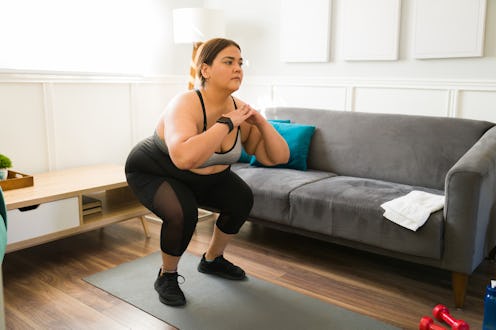
How To Do The Air Squat Exercise
Here, Steele explains how to do an air squat using good form.
- Stand with your feet shoulder-width apart and your toes pointed directly forward.
- Reach your arms out in front of you or hold your hands at your chest.
- Bend your knees and hinge your hips back.
- Keep your lower back neutral.
- Lower down as if you’re sitting in a chair.
- At the bottom of the squat, you should feel a natural balancing point where the weight of your shoulders moving forward counteracts the weight of your hips moving backwards.
- Keep your weight evenly distributed through the center of both feet.
- Be careful not to shift back into your heels or too far forward onto your toes.
- To stand up, extend your knees and bring your hips back underneath you.
- For beginners, aim for 3 sets of 10.
- For advanced squatters, do 1 to 2 sets of 15 as part of a warm-up routine.
How To Modify An Air Squat

To practice your form, stand in front of a chair or couch with the seat behind you, Fry says. Sit down and, right before your butt hits the cushion, stand back up again. You can also hold onto something for support, like a ballet barre or wall, so that your upper body can help you out if you’re off-balance or if you start to feel fatigued, Steele says.
“If you want to make air squats more challenging, play with your arm placement, repetition speed, and range of motion,” Steele adds. For example, you can try squatting with your arms reaching up overhead or with your hands held behind your head. You can also slowly descend into the squat for a count of three, then stand up in one fast count, Steele says. Or you could add pulses at the bottom of your squat to boost the intensity.
While you can keep your hips higher if needed, Fry says it’s fine to drop your hips further down until they’re lower than your knees before pushing back up to stand as a way to play around with intensity. You can also always add weights or a resistance band to increase the challenge even more. Fry suggests holding dumbbells, a kettlebell, or a weight plate, or placing a resistance band above your knees so that your muscles fatigue quicker during each squat.
Air Squat Mistakes To Avoid
One of the most common mistakes Steele sees is losing the vertical tracking of the hip, knee, and ankle when doing an air squat. “If you’re looking at yourself straight-on in the mirror, your hip, knee, and ankle should remain stacked throughout the entire squat repetition,” she says. “If you’re having trouble keeping yourself aligned, double check that your stance is truly shoulder-distance with your toes pointing forward.”
It’s also super common to do a squat without engaging the core. “At the deepest point of your squat, your torso should not be resting on your thighs,” Steele says. “Instead, maintain a bit of core engagement the entire time to protect your lower back. The more your hold your abs in front of you, the less likely you are to over-extend it.”
Studies referenced:
Marchetti, P. (2016). Muscle Activation Differs between Three Different Knee Joint-Angle Positions during a Maximal Isometric Back Squat Exercise. J Sports med. https://www.ncbi.nlm.nih.gov/pmc/articles/PMC4967668/
Mazzetti, S. 2007. Effect of explosive versus slow contractions and exercise intensity on energy expenditure. Med Sci Sports Exerc. doi: 10.1249/mss.0b013e318058a603.
Sources:
Sarah Steele, Pilates instructor, NASM-certified personal trainer, founder of SteeleSculpt
Mallory Fry, master coach for Row House
