Fashion
Curling Techniques That Work Every Time
I've often found that curling my hair is kind of like flipping a coin — there's a 50/50 chance I'll end up frustratedly throwing my hair back into a bun to hide the results at the end of it. I've heard there are ways to create the perfect curl, but I've just never been able to do it consistently for myself.
And I'm not kidding when I say I get angry. There has been many a time when I've spent over an hour blowdrying, prepping, and then curling my hair, only to end up somehow throwing everything off in the last few minutes, frantically trying to fix it with a hair brush (never a good idea), and ending up with a bushy mop on my head. Whatever I do to try to fix my mistake always ends up making it worse, and I often just feel like I wasted a ton of time putting love and care into a look that didn't even pan out. I generally don't even try looks involving curls any more because I just can't guarantee the results and don't want to put time into something that could backfire.
However, the tragedy (and yes, I'm using "tragedy" very loosely here) is that I love curls. My dream version of myself even involves me in heels and a jumpsuit rocking an amazing set of waves. So that being said, I decided to do a little research and figure out where I usually go wrong, as well as exactly what I should be doing to get consistent curls every time. If you're in the same boat, here are seven tips for awesome curls.
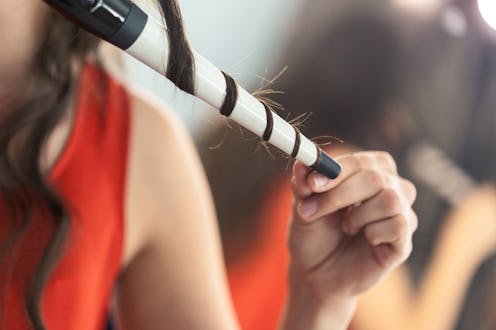
1. Start With The Right Curling Iron

T3 Twirl Convertible Curling Iron, $182, Amazon
In a piece for Total Beauty celebrity hair stylist Amita Moticka said it's important to first make sure you have the right curling iron before beginning the curling process. She noted that you'll want to make sure the size of the barrel actually corresponds to the size of the curls you want, and also recommended always using a ceramic iron as they heat hair evenly and help prevent damage. She also said to be sure you're using the proper heat setting for your specific hair type. Don't assume hotter is always better or will make for a longer-lasting curl. Instead, if your hair is fine or color-treated, use a heat setting below 200 degrees; if your hair is courser you can go up to around 300 (but never go above 400 she warned). Also, consider using a conical curling wand instead of the traditional clamping iron for a looser, more natural look.
2. Get A Pre-Heat Product

TRESemme Thermal Creations Volumizing Mousse, $5, Jet
Next, Moticka said you should use a heat protectant followed by a pre-curl mousse. This step not only protects your hair from heat damage, but is a huge factor in how well your curls actually hold. I'm one of those people who gets intimidated by certain products, doesn't buy them, and then wonder why my looks never turn out the way I want. And I have a feeling a lack of proper hair prep may be a big part of my history of styling disappointment.
3. Start At The Top
This tip from stylist Joy La Rosa actually blew my mind because it made so much sense, yet it had never occurred to me to do myself. Instead of starting your curl at the bottom of your head where the hair is most fragile and potentially the most processed, start at the top and curl down. Jump ahead to 00:45 of the above video for a simple how-to.
4. Curl Away From Your Face
According to YouTuber and beauty vlogger Miss Rylee Jade, the simplest and most flattering way to curl hair for beginners is to curl away from the face, although she also noted that some stylists will alternate directions with each curl. Go to minute 4:38 of the above video for a super easy way to know exactly which direction you're curling.
5. Twirl Your Hair, Not The Curling Iron
According to hair stylist Patrick Melville, most people make the mistake of clamping their hair in the curling iron and then twisting the iron, which he says will give you more of a Shirley Temple look. Instead, he recommended holding the iron so that the metal end is facing down towards the floor and twirling your hair around the barrel (again, going from root to tip). A heat-protectant glove is awesome for this method. Check out beauty vlogger Tati working this method at 02:31 in the above video.
6. Let The Curls Cool
Melville also noted that many people touch their curls way too soon, which causes the curl to drop and get frizzy. Wait for them to cool completely before touching or tousling — and this applies to hair spray as well, as the spray can just drag a warm curl down. So be patient! This step has always been the kicker for me and is often where I go way wrong.
7. Don't Brush Them Out
Beauty blogger and YouTuber Babs Beauty said to complete your look, tousle your hair with fingers only (no brushes) and finish with a light hair spray. She also said you can tease your hair at the crown if you want a more voluminous look. She also specifically recommended holding up sections of hair back from your face and then spraying for the best effect.
Curling our hair shouldn't be a hit or miss endeavor. Just make sure you have the right basic tools and give yourself ample time for prep and cooling, and you'll very likely surprise yourself with how consistently awesome your hair looks!
