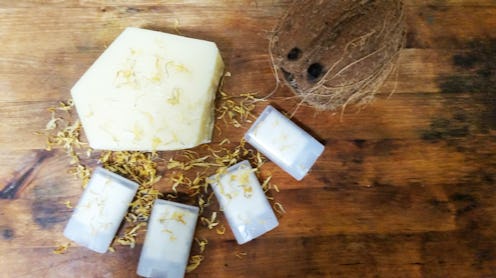
The first time I tried a homemade lotion bar recipe it was purely by accident. It happened shortly after reading several posts that claimed it was impossible to make soap without lye. Taking this as a personal challenge from the internet, I made it my mission to develop a lye-free soap mold even though I was secretly intimidated by the process of soap making (with or without lye). Having just started my homemade beauty product business at the time, I was still fretting over my skills and the possibility of wasting precious, expensive ingredients. The only thing I knew for sure when I tested my first batch was that it was 100 percent not soap; I passed them around to my friends with the disclaimer of "This product sucks" and waited for time to heal my wounded ego until I would try again.
Oddly enough, my friends reported that the failed soap attempt was actually healing chapped skin. I diligently continued my science project of a soap mold and eventually, I was able to make a mold I was proud of. But in a twist, no one wanted it anymore. Instead, they wanted another one of the accidental lotion bars I had bitterly doled out months prior. Lotion bars may not be soap, but they definitely have an important role in skin care.
Lotion bars, which are essentially solid forms of "lotion," are growing in popularity (we could probably blame LUSH for this). They are particularly great for anyone who hates the heavy feeling of creams and salves or professions that require constant hand washing.
This lotion bar recipe is great for all skin and you can play around with the ratios and different ingredients specific to your skin type. I chose these particular ingredients for peeling, cracked skin. You'll need the following:
- 2 3/4 cup of raw, mango butter
- 2 oz beeswax (hard, not liquefied)
- 2 3/4 fl oz organic, calendula oil
- Your favorite essential oils or dried herbs (optional)
- A double boiler
- A blender
- Molds and/or containers (ice cube or cupcake trays work well)
- A measuring scale
1. Liquefy Your Beeswax
To begin, add 2 oz of hard beeswax to a double boiler with water in the bottom pot. If you have a choice, beeswax pellets are easier to weigh out than having to cut chunks off a block of beeswax, but neither method will affect the outcome of your lotion bars. Once the water begins to boil, the beeswax will melt. You'll want to get it close to completely liquefied in the time it takes to complete the next steps.
2. Measure Butter
The butter is just as important as the beeswax for the consistency of your lotion bar. Measure your room temperature butter out on the scale and set aside. As long as you keep that final 2 and 3/4 cup in mind, you can work with as many butters as you want and still preserve the solidness of your lotion bar.
3. Prep The Oil
While the beeswax continues to liquefy, measure your oil of choice and add directly to the blender. You can use any oil you like, but oils that congeal should, like coconut, will require slightly smaller amounts than ones that don't, like olive.
Step 4: Get Blending
Personally, I prefer to avoid heating natural ingredients unless it's absolutely necessary for mixing, since I've found that heat can deplete nutrients in my formulas. Of course, this method comes with drawbacks as well: For one thing, it's messy AF to blend solid waxes. Beeswax is used in natural creams and lotions to emulsify the water and oil, but without the water and a boiling point to rely on, the beeswax is relentlessly stubborn. For that reason, before the beeswax is completely melted, make sure all your ingredients are in the blender, essential oils, and containers are at arm's length. Quickly pour the beeswax into the blender and begin blending immediately before it starts to solidify again.
5. Check The Consistency
Blend for 60 seconds and then open the blender and check in with the ingredients. Take this opportunity to mix in any beeswax or butter stuck to the sides and gauge how much time is needed with your specific blender. I blended for about 3 minutes total before my lotion bar was completely and smoothly whipped.
6. Add Essential Oils & Herbs
The scent you pick should be something you love, but lavender is a great way to start as it's nourishing (like a lotion bar) and it's good for all skin types. If you're making a lotion bar for the shower, adding herbs can exfoliate and soften the skin. Once you stop blending, you'll add either essential oils and/or dried herbs immediately because your lotion bars will start to harden immediately.
7. Store Your Lotion Bars
I've used BPA-free silicone molds for most of my lotion bars. Getting the bars out of them is super easy, plus the cleanup and storage is painless compared to cleaning up the beeswax in the blender! Once the sticks have completely hardened, remove from molds and wrap in plastic wrap for individual storage.
I was tempted to make lotion sticks that I could apply on the go because you never know when a dry patch of skin will creep up. I used small deodorant containers that allow for pushing the lotion forward as it's used. Both work great and have their own perks and if you've got a killer recipe? It won't matter if you choose bar or stick.
Estimate a date from the ingredient expiration dates on your products to ensure you're always using a fresh lotion bar. Remember, these lotion bars are free of preservatives so they're prone to bacteria and can go rancid quicker than ones bought in the store. Happy moisturizing!
Image: Kristin Collins Jackson (11)