Fashion
A Jeweled Clutch DIY Made for Summer Weddings
I'm only a few years out of college (though it feels like it's been decades), so the Save The Dates and wedding invites are just now starting to roll in from my old college (and high school) buddies who are tying the knot with their wonderful significant other. And while I generally love going to weddings, there's one thing that puts a little bit of a damper on the entire situation: Finding (and often buying) new outfits for each and every big day.
Considering that we’re only about halfway through the months-long summer wedding season, there’s a good chance many of you are struggling with ways to keep your wedding attire both fresh and chic (even if you do have this handy guide on what to wear to a summer wedding and a list of 15 summer wedding guest dresses to buy right now). Fortunately, if you live by the philosophy of using statement accessories to change the look of an outfit entirely, the solution is simple: Just throw a different killer necklace, envy-inducing shoe, or amazing clutch into the mix to keep that same little black dress looking brand new at every summer ceremony.
And speaking of a clutch: Instead of going out in search of an outfit-making piece practically every other weekend, why not make your own with a super simple jeweled clutch DIY? You can do just that in three ridiculously easy steps.
1. Gather your supplies

For this step, the possibilities are nearly endless, but here are the supplies you’ll definitely need: Your clutch of choice (a foldover clutch is best so you can jewel the flap); jewelry bonding glue (I used E6000 Jewelry & Bead glue); rhinestones (pick any color, shape, size, and amount your heart desires); and any other embellishments you’ll want to add to your bag. For example, I thought about adding this pair of jeweled earrings for a bit of diversity, but decided to go all rhinestones in the end. Honestly, the embellishments are where you can get really creative, so have fun picking out the jewels and pieces you’d like to add on.
2. Arrange your jewels

Rather than just launching straight into the gluing stage, take a few minutes to arrange your jewels in your pattern of choice. Prearranging guarantees you won't be stuck struggling to cram jewels into the final corner of your clutch after discovering they don't quite fit.
3. Get to gluing

This part of the process is pretty simple but tedious, so turn on your favorite TV show — may I suggest an old episode or two of The Mindy Project ? — and start gluing, being sure to press and hold each rhinestone for a few seconds after gluing to make sure it sticks.
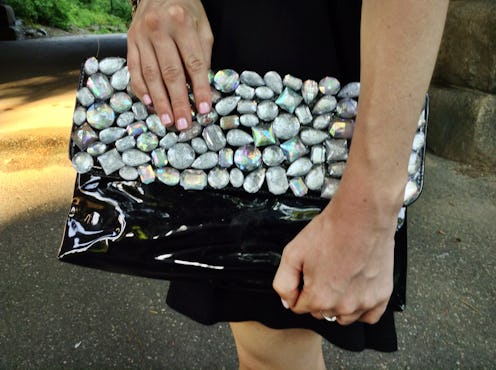
4. Head down the aisle (or, rather, watch your friends do so)

Once you've finished gluing all of your rhinestones and embellishments (the process should take between 30 minutes and an hour, depending on how large your clutch is), give your hot new bag several hours to a day to dry. Once it's ready, throw it on with your go-to summer wedding guest dress, head to the chapel, and prepare for compliments!

Images: Mary Avant (5)
