Fashion
I Promise The Rope Braid Is Actually Really Simple
I've found learning how to rope braid to be a little different from the traditional three-strand braid and its variants (like the fishtail braid and the four-strand braid). Instead of looking at it and thinking, "Woah, I wonder how she did that," I've thought: "I can totally do that." On the surface, the rope braid seems pretty simple. It looks like all one has to do is just twist two sections of her hair together. (And once you know the trick to it, it is pretty simple and is basically just twisting two sections of hair together.) But I'll admit I've tried on multiple occasions (yes, even when I already knew it wouldn't work) to divide my hair in two, twist, and tie. And if you've tried this too, you'll know that the hair has a way of simultaneously unwinding and laughing in a distinct, "Hah! You can't tame me!" kind of way. Dramatic? Maybe a little. But it can be pretty annoying when something that looks so simple isn't quite that simple after all.
Well here's the trick that will take back the rope braid. It will both look and actually be simple. You see, it's all about creating friction. Because the two sections aren't weaving together like a traditional braid but being twisted in the same direction, there has to be some traction so they won't simply unravel. So without further ado, here's how to accomplish the elusive rope braid. And it really is as easy as one, two, three.
1. Separate Hair into Two Equal Sections

Pretty simple, right?
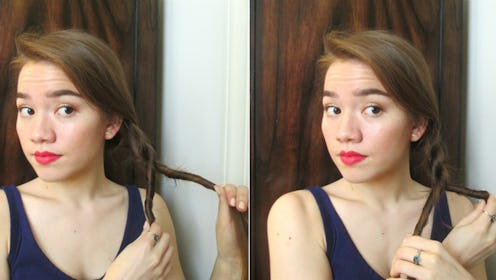
2. Twist Both Sections AWAY From Your Face

This is part one of building traction. By making sure the strands of your hair are all facing one direction, the rope braid will hold when you wrap them together in the opposite direction.
3. Wrap The Sections Together TOWARD Your Face

Once both sections have been completely twisted away from your face, begin twisting them together in the opposite direction which is towards your face. In other words, when you wrap the two sections together, the section closest to your face should be moving underneath and back. The section closest to the back of your head should be moving over and forward. After you've finished wrapping the sections together, simply secure with an elastic, and you're done!

Images: Miki Hayes
