Beauty
How To Dye Your Brown Hair Red Without Using Bleach
Get that perfect Ariel color.
If you're a brunette and have spent any time on Pinterest browsing hairstyles and colors, you may have developed an acute curiosity on how to dye your brown hair red. (I know I have.) If you think you might be ready to take the plunge and trade your brown mane for something a little more spicy, read on as I share the finer points of using red hair dye without bleaching on your brown hair.
Personally, I've had a fairly long standing relationship with red hair dye. I'm naturally blessed with beautiful brown hair (and have a few highlights currently), but as gingers were prevalent in both my mother's bloodline and my step-mother's family, I've always found myself drawn to the mystique of this recessive trait. Not to mention, associated it with strong, beautiful, and accomplished women. So in eighth grade, I experienced my first foray into the world of processed red hair and have been moving between being a brunette and a red-head casually on and off ever since. Because although I love my chestnut locks, sometimes they can feel just a little too vanilla.

Over the years, I've gone both the DIY route and the professional stylist route in terms of coloring, and while I enjoy relaxing while someone else maintains my mane, the cost can add up. And since the coloring process is a hurry up and wait sort of scenario, dying brown hair red at home can be much more comfortable.
Before we proceed, I do want to take a moment to add a brief disclaimer: I am not a professional hairstylist, and although I've had quite a few years experience with my own hair (which is quite fine, and a tad oily), what I share here won't work exactly the same for everyone. Nor, am I implying that I have the best methods, and as with any new experience, if you have health concerns or special circumstances (pregnancy, skin sensitivity, etc.), please consult a professional and do a little research. Hair dye can be caustic, and most dye instructions will caution you to do a small test in a non-visible location to ensure you don't have any negative reactions to the dye. Always read the instructions that come with your red hair dye prior to use.
Okay, let's talk color. When you transition from brunette to red, your first consideration will be which hue is going to work best for your skin tone. Reds are either copper based, blue based (which creates more of a true red), or purple based. The various hues play differently with different color palettes. Do a little research on which red hair color will look best on you, then, when you go to purchase your red hair dye, check for sample hair swatches to hold against your skin so you can see for yourself how the dye will bring out undertones in your complexion.
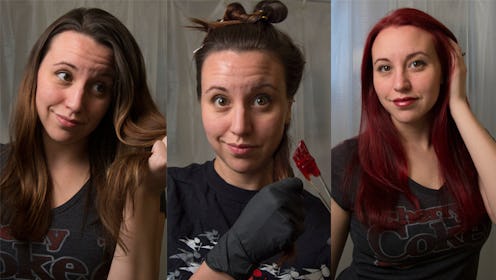
Since I have medium skin tones that tend to be the slightest bit olive, I can get away with a little more pigment in my hair. In the past I've played around with coppers and fire engine reds, as well as more purple based reds. What I've found is that I look best in the true red to copper spectrum. Today I'll be going for a fiery, fun, Ariel inspired color. It's a bold look, and if you go this route, you'll want to mentally prepare yourself for looks and comments. You're likely to get both positive and negative feedback (ironically, I'm pretty sure my dad hates when I go this bright), but keep your head up. What matters is that you enjoy your bold color choice.
Once you've nailed down your hue, it's time to gather your supplies. The good thing (for your hair health) is that you can use red hair dye without bleach. For this, personally, I roll hard and go straight to Sally Beauty. I do this so I can purchase my red hair dye and developer separately (along with my conditioner), since more often than not, I already have developer at home. If you choose to go with a simple box brand from your local grocery store, that's fine too — many of these are super simple to use. The downside is that the color range at grocery stores and pharmacies can be limited, and some of them may require pre-lightening. If you're aiming for a red that's any lighter or more saturated than your current brown, you'll want to find something that doesn't require pre-lightening. Having to lighten your hair prior to dying it (without professional experience) is both annoying and potentially dangerous for your locks.
If this all sounds like a foreign language, here are the basics of what you need to know. Standard developers come in the following types: 10 Volume, 20 Volume, 30 Volume, and 40 Volume. Each volume has a different lift factor, which has to do with how dark your hair is currently, and how light you'd like to get it. 10 Volume developer has little to no lift, 20 Volume is pretty standard for grey coverage and will lift hair 1-2 levels. 30 Volume creates 2-3 levels of lift, and 40 Volume lifts 3-4 levels, which is quite a lot. So if you've got dark brown hair, and you want strawberry blond or bright red hair, you'll require quite a lot of lift. For example, to go from my natural, semi-dark, chestnut hair color, I needed to use a 40 Volume to get to my intended Ariel red.
Back to our shopping list.

- L'Oreal Excellence HiColor HiLights for Dark Hair Only in Red (or your choice of single step, multi-level lift hair dye). Depending on your hair length, you may need more than one box. For my hair, two boxes is best. I also included a box of L'Oreal Excellence HiColor Reds for Dark Hair Only in H8 just to add a little more copper color.
- A bottle of 40 Volume developer. You may require more than one bottle, again, depending on how long and how thick your hair is. Each box of hair color will require about 2.4 fl. oz. of developer.
- One non-metal mixing bowl
- One applicator brush
- A measuring cup
- One pair of plastic or latex gloves (reusable are nice!)
- Hair clips — these should be non-metal, but I only use them on my un-dyed hair, so take a risk with the metal clips I have at home.
- A wide toothed comb
- Vaseline
- A handful of packets of deep conditioner (I prefer Ion conditioner packets)
Before you begin, put on an old shirt that you don't care much about, as it will get stained in this process. Also, remove anything you wouldn't want accidentally dyed from your work space, and if you're feeling extra cautious, throw some old/dark towels down on the ground. Depending on how messy you are, you may have some red splatter when all is said and done, so if you're renting, your landlord will really appreciate the extra care. Last of all, make sure you open a window! If your bathroom has neither a window or a ventilation fan, you'll want to bring in your own fan, and work with the door open so that you're not breathing in as many fumes.
1. Step 1: Brush & Section Hair

Brush your dry, unwashed hair and clip it up into sections, leaving the bottom section down. AJ Lordett, color director at Fekkai Madison Avenue, specifically says to split your hair into four different sections. To do so she says, "Whether or not you do a middle part, start in the middle and go from the center of your forehead all the way to the back middle nape of your neck. Clip one side out of the way or half your head. Then, use the ears as a guide for the sides — from the middle part to the ear on each side. Start with the unclipped side and go from the middle part to the ear and clip into two. Then, repeat on the other side."
Step 2: Protect The Hairline
When it comes to protecting your hairline, Garnier celebrity hair colorist Nikki Lee recommends using a barrier cream to prevent staining the skin. However, she explains that if you don't have one on hand, Vaseline or lip balm works.
Rub a thin layer of Vaseline onto your face, around your hairline. This will help lessen the amount staining that occurs from dye touching your skin. Wash any excess Vaseline from your hands.
Step 3: Mix Color


Put on your gloves. Measure out and combine your entire tube(s) of red hair dye and developer in the non-metal bowl. Most dyes ask for 2-2.4 fl. oz. of developer per tube of dye, but be sure to read the directions provided in or on the box of your hair dye.
Step 4: Begin Applying Red Dye On Brown Hair

With both gloves on, begin brushing the mixture on to the first bottom section of your hair, beginning at the roots. Lordett explains that natural hair color is typically lighter on the ends, and you want to mimic that. She recommends beginning with your color at the top and extending it down your ends so that they don't become darker than the root and look unnatural. She also suggests using the Fekkai Technician Color Treatment Flash Mask on the ends before applying your bottom color in order to help prevent this.
Carry on this way with each section, un-clipping as you go, making sure to apply dye to both the top and bottom of the hair layers, fully coating the strands as much as possible. This whole process can take between 10 and 20 minutes, depending on your speed and how much hair you have to cover.
Step 5: Let Hair Set

Secure your hair on top of your head (using non-metal clips or a hair tie). Use soap and water and/or a tissue to remove the excess dye from the skin surrounding your hairline. The sooner you do this, the less you'll end up coloring your face and ears, which is nice. The Vaseline should make this process go pretty smoothly.
Set an alarm or timer for 30 minutes. (This time will vary, depending on the dye you've chosen and how much lightening your developer needs to achieve, so be sure to double check your directions so that you don't damage your hair). Then wait.
Personally, I take this downtime to clean up whatever dye has splattered about my work surface, since the longer it sits, the more permanent it becomes. It's also a nice opportunity to rock a Bioré strip, or get your late night dance on.
Step 6: Rinse
As soon as that timer rings, take a peek at your hair. If it looks like the color has set in, then take it down and hop in a warm shower.
You'll be in there for a while, so you may want to keep that music playing. Once the dye has washed out (you'll know because it will look less like a murder scene, and the water coming from your hair will be running mostly clear, with a possible slight pink tint — but this can take a long time, like 5-10 minutes, so relax for a bit), it's time to apply your deep conditioner. Leave the conditioner in for at least 3-4 minutes, then rinse again. Do not use shampoo. In fact, you may want to hold off on shampoo for the next few days, if you can manage, conditioning only, so that the color stays vibrant.
Step 7: Style
Dry and admire. Yeah, girl! You look good!


Now before you go, there are a few final tidbits of wisdom I'd like to impart upon you:
1. Any dying that involves lightening can be a little tough on your hair. You'll want to continue to deep condition regularly in order to keep your locks healthy and happy. You can also up your intake of fish oil or flax seed oil, and add biotin to your daily vitamins.
Lee recommends using Garnier’s new Nutrisse Color Revivers, which she explains are, "a great treat for post-colored hair – they instantly restore softness and smoothness to hair while refreshing color." Lordett says to not forget to use a color-safe shampoo and conditioner for your specific hair type.

2. Keep in mind that red pigment is much more difficult to maintain than brown. The red molecules in hair dye are large, and therefore don't tend to hang on to your hair quite as long. So, in order to keep your new color vibrant, you'll want to refrain from overly hot showers (unless you're wearing a shower cap), start using shampoo and conditioner formulated for colored hair (specifically shampoo that's sulfate-free), and keep some extra dye/developer on hand for touch-ups. Don't panic if you see red pigment in the water when you shower — that's to be expected. But don't wear your favorite white shirts, sleep in white sheets, or use white towels within the first few days of dying, unless you're looking to turn them pink.
3. You may find yourself making subtle changes to your makeup and wardrobe. Keep in mind, the red hair will bring out underlying tones in your skin, so you may have to adjust your foundation. And, when choosing your outfits, remember that analogous colors and complementary colors will make your new hair shine.


There you have it. Now, I look (a little) more like Ariel, and you know how to dye your brown hair red. So go forth, and be cherry!
Images: Author's Own
This article was originally published on April 30, 2015
This article was originally published on
