Beauty
How To Use The Dyson Airwrap Properly, According To A Pro
Plus, the most common mistake to avoid.

As a beauty editor, the most common question my friends ask me is if Dyson’s cult-favorite hair tools are worth their price tags, so I’m happy to do everyone a favor and reveal the truth to the masses: The answer is yes.
That said, if you’ve ever wished that you can test out the devices or learn how to use the Dyson Airwrap before you fork over your credit card, now is your chance: Dyson is launching in-store paid styling services for consumers to try out its hair tools. Seriously. You simply book an appointment, arrive at the store, get your hair washed, then sit in the styling chair to consult with the pro about what look you’re going for. An hour later, you’ll have an amazing blowout (or updo or whatever your style of choice may be) for $50 — and you can use that fee towards the purchase of a Dyson tool if you wind up loving it. The downside is this is only available in Manhattan for now, but the brand hopes to expand to other locations in the future.
If you’re not in the tri-state area, don’t fret: I went in for a session to soak up all the info I could. When I met with lead Dyson hairstylist Marisela Rojas to test out the styling service, I — and a lot of TikTok apparently — specifically wanted to know how to actually use the Airwrap. With so much conflicting advice out there on how to use the tool, she walked me through each step for a definitive guide on how to use it correctly. Keep scrolling for the details, straight from a pro.
We at Bustle only include products that have been independently selected by our editors. We may receive a portion of sales if you purchase a product through a link in this article.
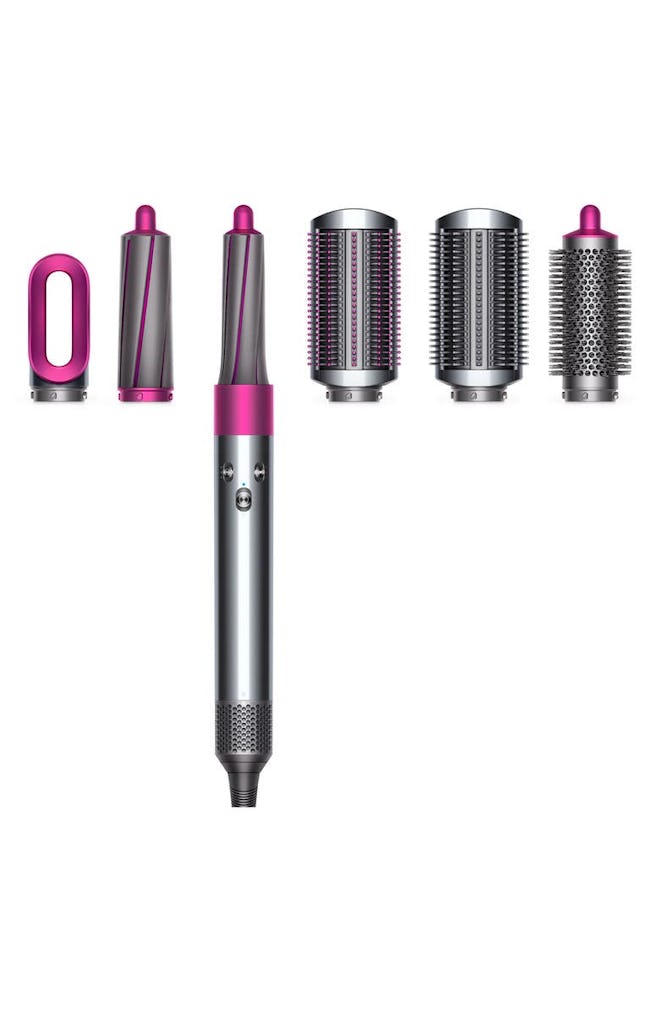
1. Use On Damp Hair
First, she says one of the most common mistakes people make before using the Airwrap is not leaving the hair damp enough when drying; people are either using the tool on completely dry or completely wet hair. According to Rojas, you’ll want to make sure your hair is anywhere from 20 to 30% damp in order to get that perfect hold.
2. Divide Your Hair Into Sections
Next, you’ll section off your hair in four quadrants — the back, the left side, the right side, and the crown of your head — with clips. Depending on your hair texture, Rojas notes you’ll probably be sectioning off hair in even smaller sections (this works best on thicker and curlier hair types), so do what’s best for your particular strands. If you’re looking for a blowout style, she also suggests thick and curly hair types to smooth their hair before going in with the barrels.
3. Curl In The Proper Direction
Before touching your hair with the styling tool, it’s important to take a look at the curling barrels: Each barrel has an arrow on it to dictate the direction the hair is going to wrap around. Rojas says it’s imperative to look in the mirror to see where the arrow is pointing before using it. If the arrow is pointing to the left, you’ll want to use it on the left side of your head. If the arrow is pointing to the right, you’ll want to use it on the right. Following the arrows, according to Rojas, will ensure you wind up with symmetrical waves on both sides.
4. Wrap Your Hair Around The Barrel
You’ll then want to take whatever section you’re planning to curl and pinch hair at about four inches from the ends, says Rojas, leaving the ends free to wrap around the barrel once you turn it on. For proper placement, she advises holding the barrel vertically and placing it right behind the ends of your hair. Then, turn it on and watch your hair instantly wrap around the barrel to curl. Rojas says to work the barrel up your strands and holding it for 15 to 20 seconds per section.
5. Set Curls With The Cooling Setting
One trick Rojas says helps to set your curls involves the cooling setting: After you’re finished wrapping and curling one section, push the power button up for the cooling option and hold it on your hair for 10 seconds before turning it off. The barrel will immediately let go of the strands you styled to reveal bouncy curls. Repeat the wrapping, curling, and cooling on all the sections.
Pro tip: For styling the back — which is the trickiest for most people — Rojas says you must tilt your head at an angle so you can see the back section in the mirror. She actually believes it’s easier to start from the back and work your way to the front.
6. Use Smoothing Brush To Loosen Curls
For smoother curls and waves, use the smoothing brush attachment for a voluminous blowout. Spritz it with some hairspray for a longer hold and you’re good to go.
After my styling session, I walked away with the ’90s supermodel hair of my dreams... and newfound confidence in using the Airwrap on my own.
This article was originally published on
