The first DIY, natural microdermabrasion treatment I used was so successful I immediately began incorporating it into my weekly face routine. At first, I didn't fully understand why this recipe continued to improve my complexion even though exfoliates I'd tried previously caused dryness. Now I know that at home microdermabrasion treatments are completely different from the ones performed by a dermatologist, who will use tiny crystals to remove the top layer of skin in a non-invasive procedure. While the cost of the procedure at a doctor's office is significantly higher, the results are more immediate than whipping up your own recipe. Natural remedies take time, but often the side effects are far less severe. Plus, you have a plethora of ingredients to choose from, so you can mix and match to find your perfect, non-irritating formula.
It's no secret that exfoliating is essential for healthy looking skin. However, just like never exfoliating your skin can be risky biz, the same can be said for over-exfoliating your face. Microdermabrasion recipes should be gentler with very fine exfoliates that help remove dead skin cells, improve complexion, and begin to lift dark spots.
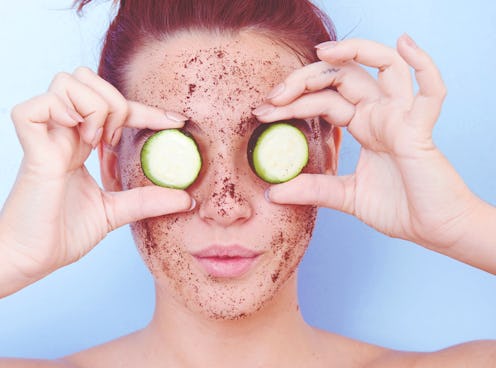
I've found these microdermabrasion recipes incredibly helpful for keeping my skin even and smooth! But before you start, you should prep your skin for treatment.

To do so, make sure your skin is free of makeup before you start your treatment to avoid clogging your pores. Before you apply each recipe, wet your face with warm (not scalding) water to open your pores while your mask is applied.
1. Baking Soda, Raw Honey, & Lavender

Since the slightly grainy consistency of raw honey is exfoliating on its own, you only need a smidge in this recipe. I used one tablespoon of raw honey, two teaspoons of baking soda (seriously, no more than that) and two drops of lavender. The portions of this recipe are important because the baking soda is alkaline and while the lavender is calming it shouldn't be used in excess without carrier oils. The honey will balance the other ingredients while aiding in lifting dark spots. Mix your ingredients well and apply on makeup-free, damp skin, gently massaging into your pores.
2. Nutmeg & Lactic Acid

This recipe is one of my true loves. My skin (and my taste buds) love nutmeg and its tiny grains that work deep into the skin taking down inflammation and pimples one circular motion at a time. I start with one teaspoon of nutmeg, then add a tablespoon of organic milk (coconut milk and hemp milk work great) and massage gently on my skin and neck. The lactic acid in the milk is great for acne, so this microdermabrasion recipe is ideal for acne-sufferers.
3. Lemon Juice & Cornmeal

I love using cornmeal when I make masks for people who have a sensitivity to baking soda. It gently exfoliates deep into the skin and has healthy nutrients your pores will just lap up. Add lemon juice to the cornmeal to form a paste and gently lift scars and uneven skin tone. Be cautious on your lemon juice as it is a natural astringent, you'll definitely want to use UV protection anytime you use lemons.
4. Brown Sugar & Coconut Milk

Brown sugar and I have had a tumultuous relationship, mainly because when I've made body scrubs with the stuff I often end up with a disgusting looking blob because the grains are so fine. But when I use it for a microdermabrasion recipe? It looks fly AF. I used about two teaspoons of coconut milk and slightly more brown sugar to make a paste before smearing on my skin. Sugar is a stimulant which can help bring down puffiness and coconut milk is naturally antiseptic and soothing. Perfect for when your face has a case of the Mondays.
5. Oatmeal & Pineapple Juice

Oatmeal is a great exfoliating ingredient. To make this microdermabrasion recipe, I use the powder from the oats because the consistency is ideal for gently penetrating pores. Use fresh juice from the pineapple to form a paste and to get some extra lightening and astringent properties. Massage on your face and neck and rinse with lukewarm water.
After You Mask...

After you've rinsed your mask off with lukewarm/cold water (which closes the pores) you can use a gentle, soothing or oil controlling mask. I like to use equal parts rose water and coconut milk after I exfoliate. If you usually apply an astringent after cleansing, use caution because your skin may be sensitive from exfoliating, I usually skip that step and go straight to my moisturizer.
Image: HConQ/Fotolia; Bryony van der Merwe /Getty Images; Kristin Collins Jackson (6)
