I love gliding through my social media feeds, checking out all of the beautiful, lovingly detailed nail art. However, I am no expert when it comes to meticulous manicures, so the best solution for me is simple nail art. I'm sure like anything, practice makes perfect when it comes to nail art, but when you're a busy millennial gal — juggling a career, an active social life, hobbies, and maybe a family — finding the time to learn how to create marble effect nails unfortunately doesn't take priority.
There's also a certain creativity involved with nail art and if your artistic prowess is limited to drawing stick people, you might feel disheartened when you see elaborate nail art all over Instagram. Even if you do have an artistic spirit, creativity just doesn't happen. It pounces often in the most inopportune moments when you're sat at your desk, in a meeting, or while running errands. Creativity is a fickle lover: In one moment it can fill your entire being with energy and purpose, the next it is gone without even a note.
So for gals who are short on time, creativity, patience, or motivation here are a selection of one step nail art tutorials to help you get beautiful nails in a jiffy. FYI, most of these manis involve starting with pre-painted nails and finishing with a topcoat, but creating the actual nail art is just one step – I promise!
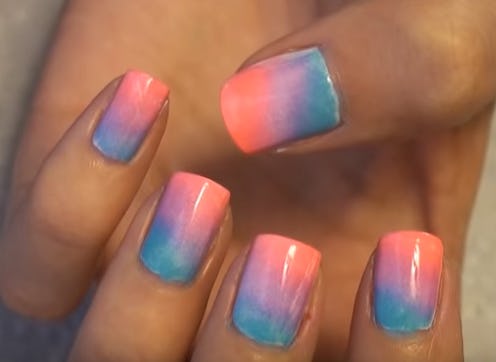
1. Ombre Effect Nails
This astoundingly simple nail art is created by painting a sponge and dabbing the sponge onto each nail. Ensure you have two coats of a white base polish applied to your nails first, then your nails will be ready to be transformed. The finished look is contemporary and very pretty in this particular color way. Feel free to change up the colors to suit your outfit or to suit a special occasion.
2. Salt Nail Art
This sounds so kooky, but the finished look is whimsically wonderful! Instead of using microbeads that may adversely affect the environment, you can use a more eco-friendly alternative: Salt. Prepare your nails by painting them in any color you like – this vlogger has gone for complementary pastel shades. All you need to do is apply clear polish to your painted nails and "drizzle" salt on top. Finally, seal the look with a top coat and your look is complete!
3. Rainbow Dinosaur Print
This manicure is deceptively easy to achieve. All it entails is painting spots onto pre-painted nails and finishing it off with a top coat. That's it!
4. The Newspaper Print Nails
This manicure is so clever and the finished results are spectacular, considering the little amount of work put into it. Prepare your canvas by applying a base coat and a light polish. The "nail art" in this cool look is accomplished with rubbing alcohol and newspaper and finished off with a topcoat. This look is perfect for bookworms, writers, journalists, or anyone who wants to rock something a little different.
5. Fluffy Nails
Fluffy nails make a contemporary nod to the nostalgic '90s. As seen in the first tutorial within this video, you need to paint your nails before beginning, in order to match the shade of your flocking powder. Begin by applying a top coat to your nails and in the words of this vlogger, all you have to do is, "...Simply dump the powder onto the nail!" Continue applying the flocking powder and pressing it down until your nails are covered. You're left with frivolous and fun fluffy nails. If you fancy more fluffy nail art, continue watching this tutorial to the end for a fluffy stripe manicure and a furry leopard look.
6. The Splattered Style
With your nails painted white and the skin surrounding your nails protected with tape, you're ready to go. Mix together your favorite bright nail polishes with nail polish thinner (or nail polish remover) and start splattering! You can choose as many colors as you want to create a subtle or vibrant look. As usual, finish your nails off with a top coat and you'll have a mani that Jackson Pollock would be proud of.
7. The Adorable Heart Design
This manicure involves a tiny amount of preparation including: Painting your nails and cutting a heart out of a piece of tape. For the most simple style, skip through the tutorial to watch this vlogger use a single nail polish to create a sparkling heart. If you feel like going the extra mile, follow the instructions at the start of the video to create a super simple gradient heart instead.
These one step nail art tutorials ensure that even us lazy gals can have gorgeous nails too! Although now we have no excuses not to look perfectly polished...
Want more beauty tips? Check out the video below, and be sure to subscribe to Bustle’s YouTube page for more hacks and tricks!
Image: JennyClaireFox/YouTube
