It's been a little over a week since Apple released the iOS8.3 update for its iPhone line — including, of course, a whopping 300 new emoji, many of which bring some much-needed diversity to the device's iMessage character lineup. But although the options are there now, many have been left pondering one simple, yet essentially question: How do I use the new emoji in the first place? I mean, I know they're there… but how on earth do I gain access to them?
The good news is that, although it may not be perfectly obvious, sticking emoji with the five different skin tones now available into your iOS text messages is actually pretty simple. Like most Apple device tricks, it's a relatively streamlined process involving a series of strategic taps, flicks, and holds. But just in case there are any lingering questions, here's an attempt to clear up the confusion: An easy-peasy, step-by-step guide to using the new racially diverse emoji, complete with screencaps so you can see exactly what's going on in each step.
If you're wondering, “Who the heck actually needs a guide to access these things?”, congratulations! You may now cease reading. If, however, you need a little help, then ignore the people scoffing at you and continue onward. There's no shame in asking for help when you need it.
Ready? Here we go:
1. Open your SMS window.

This should be self-explanatory.
2. Tap the “Globe” icon in the lower left hand corner to bring up your emoji keyboard.

If your iPhone's default language is English, all you need to do is tap the icon once. You can, however, also hold it down to bring up a menu of all the keyboards you currently have available on your phone:

Just, y'know… FYI. Anyway, for now, either just tap that globe or tap it, hold it, and select “Emoji.” This will bring up your emoji keyboard
3. Select the “People” category and bring up the emoji capable of representing diversity.

You can do this one of two ways: Either tap the little smiley face icon on the left hand side (between the clock and the tree icons, indicated here with a red arrow), or just swipe left across the emoji keyboard itself. Initially, what you'll see is the options for simple faces; continue swiping left until you see these guys, gals, and others:

Those are the emoji you can customize (yes, even the random body parts).
4. Tap and hold the emoji you want to customize.

Let's use the “Bitch, Please” emoji as an example, solely on the grounds that it's one of my favorites. Tapping it and holding it will bring up the different skin tone options now available for it. But keep holding it — this is very important.
5. Select the skin tone you want to use.

Are you still holding the icon? Good. Now, without lifting your finger from the keyboard, slide it to the skin tone you want to use. Then lift your finger off the keyboard. When you let go, you should see something that looks like this:

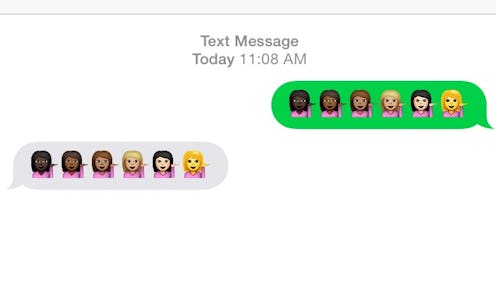
You can do this as many times as you want, for as many skin tones as you want. And yes, the plain yellow one is an option. Is it weird? Kind of. But at least we know why the default emoji color is yellow now, right?
6. Hit “send.”

Et voila! Emoji that aren't just white or cartoons. Neat-o, right? Head here for more fun emoji tricks — and don't forget to check out Twitter's new Star Wars emoji while you're at it.
Images: Lucia Peters (10)
