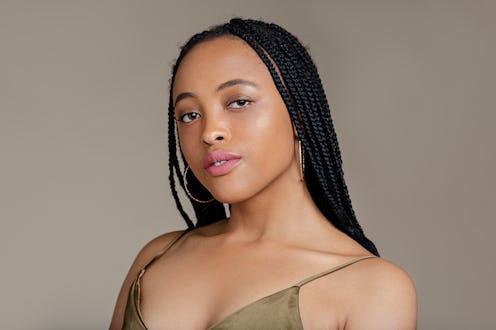
When someone with sharp-looking box braids walks into a room, it’s hard to not stop and admire the endlessly cool hairstyle. While it’s a classic, braided extensions can be tough to master on your own, and scheduling an appointment with a professional can be an expensive all-day endeavor. An alternative worth considering if you want the chic look minus the drawbacks? Learning how to do crochet braids.
In essence, the protective style involves already-braided hair that’s purchased and then attached with a latch hook to your natural hair. Probably the most attractive thing about this styling method is that it’s a huge time saver, often taking just a couple of hours. That’s compared to traditionally crafted braids, which require that you braid your natural hair into the purchased strands and can take anywhere from five to eight hours.
Crochet braids are super easy to achieve on your own, making them a DIY beauty aficionado’s dream — and, with the right touch, they’re almost indistinguishable from traditional braids. What’s more, the crochet method isn’t just limited to braids: You’ll also find passion twists, locs, and other hairstyles and types that are designed for crocheting. Felicia Leatherwood, celebrity stylist and natural hair expert, notes that crochet braids are also quicker and easier to take down and allow for tons of versatility by way of hair types and textures. Keep scrolling to learn how to do crochet braids at home, which just might become your new favorite protective style that’ll deliver get-up-and-go freedom for four to six weeks.
We at Bustle only include products that have been independently selected by our editors. We may receive a portion of sales if you purchase a product through a link in this article.
1. Purchase Your Materials
First, you’ll want to decide on your look and type of hair. The options are plenty, from synthetic to blends or 100% human strands. Once you’ve got your extensions, Leatherwood says you can buy a latch hook crochet needle online or from your local beauty supply shop or crafts store. You could also opt to jazz things up a bit with beads or cuffs on your braids.

2. Prep Your Natural Hair
Leatherwood says to start with clean, well-conditioned hair. You’ll see folks use different techniques — including creating individual twists or braids — but the quickest way is to create cornrows to which you’ll attach your crochet braids. If you go that route, Leatherwood recommends using a protective cream while cornrowing so that your hair stays moisturized. Another tip: “Be careful not to braid the hair around the nape of the neck and the crown of the head too tight,” she tells Bustle, noting to also be careful with the strands around your hairline in order to avoid breakage. As Dr. Kari Williams, a trichologist and celebrity stylist, previously told Bustle, too much tension on the hair follicle can cause the follicle to release your hair strand.

3. Install The Braids
Once you’ve got your cornrow base, you’ll want to feed the crochet needle underneath the cornrow. Then, attach the loop of the crochet braid to the hook of your needle and pull it through and under your cornrow. From there, grab the end of your braid and feed it through the loop, pulling it taut and securing it. You’ll repeat this until your whole head is covered. Leatherwood recommends clicking through some YouTube or TikTok videos to really get a grasp on the visual.

4. Care For Your Braids Until Removal
If you opted for synthetic hair or a blend, it can get become tangled and frizzy pretty easily. To get the most life out of your style, be sure to cover your crochet braids with a silk or satin bonnet or scarf while your sleep. Also, be careful about using products that are overly heavy or oily, as this can lead to buildup. Then, when you take your crochet braids down, Leatherwood says to shampoo, condition, and thoroughly detangle your natural hair — and you’re good to go until your next ‘do.

