Beauty
Everyone's Going To Want A C-Shape Haircut This Spring
The ’90s-inspired cut works on all hair types.

The trendiest hairstyles from the ’90s were all about volume. There was the supermodel-esque voluminous blowout, big, fluffy bangs, and, of course, “the Rachel.” And since practically all beauty trends from the era are back in style, it’s really no wonder that the very ’90s-inspired C-shape haircut is spring’s most coveted look.
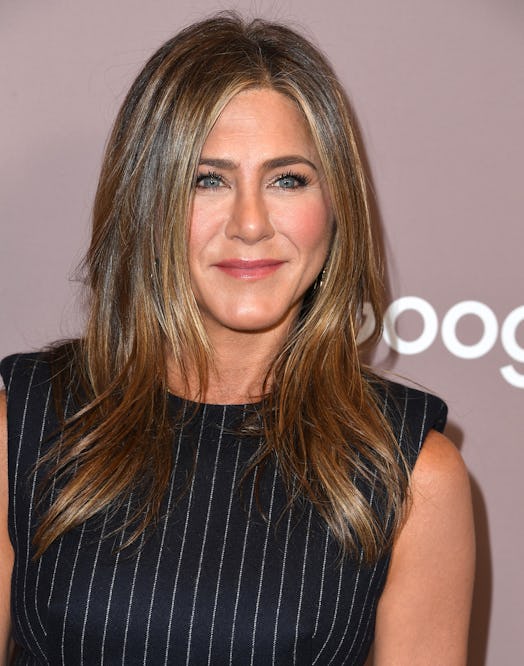
A C-shape cut is all about adding soft, long layers that descend down to your collarbones before curling in towards your face to form a “C”, says Tara Zigler, a hairstylist with Lotus Star Salon in Lake Worth Beach, FL. The cut gives off nostalgic ’90s vibes as a more updated version of the Rachel, and it’s a trend that’s already become a big hit on TikTok.
Perhaps the best thing about the C-cut is that it’s extremely versatile, notes Michelle O’Connor, a hairstylist and global artistic director at Matrix. The face-framing layers look great on all hair types and textures, she tells Bustle, whether you have stick-straight strands or fluffy curls. For curly girls, the cut appears to round your hair into the shape of a “C”, while on straight hair the layers swoop in starting at the chin.
The style is ideal for folks with super thick hair, O’Connor says, since the shape provides texture without adding weight. And if you have shorter hair, she notes you might like how the cut gives the illusion of longer hair thanks to the way the layers cascade toward your shoulders.
Curious about the pretty style that seems to work on everyone? Read on for everything to know about the C-shape cut, according to hairstylists.
What Is The C-Shape Haircut?
According to Darrius Peace, a master hairstylist with Hayah Beauty, the C-cut has long, face-framing layers or bangs that come down to that chin before layering into your longer strands. These longer pieces typically extend to your shoulders or just below. “Some might say that it gives a sophisticated, grown-out mullet vibe,” he tells Bustle.
This look is fast becoming a huge trend not only because of its voluminous bounce, but because truly works on all hair types and is suitable for all face shapes. So if you want to give it a go, you can’t go wrong. “Its framing nature hugs the face while offering the versatility of being able to pull it up or wear it down,” Peace tells Bustle. “It’s a gorgeous look either way.”
What To Ask For At The Salon
To get this ‘do at your next salon visit, ask for lots of soft layers that start at your chin and round in at the bottom to curve towards your face, O’Connor says. “A visual reference is always great to provide your stylist with, especially since there are many variations of the cut, depending on your hair length,” she adds.
The execution of the C-cut is exactly the same on straight and curly hair, though curly hair will make it look even more voluminous, Peace says. “Although it is the same type of cut, it translates differently on curly and straight hair,” Peace adds, noting that that same cut can also be done on locs.
It’s also important to get a full trim to take off any split ends, says Bradley Leake, a Los Angeles-based celebrity hairstylist. “This cut is perfected by strong, healthy ends flipping up and in towards the face,” he tells Bustle.
How To Style A C-Cut
Step One: Wet Hair & Apply Product
Start with wet hair. Apply styling products that’ll give your strands some lift, like a root booster or a volumizing mousse, says Amber Wagner, a hairstylist and owner of Vanity Salon in Spring, Texas.
Step Two: Protect
Next, Wagner recommends spritzing on a heat-protectant spray. That way you’ll get a good curl without frying your ends.
Step Three: Dry With A Diffuser
Attach a diffuser to your blow dryer, Peace says, and dry your hair around your face. The diffuser will ensure your hair dries without adding frizz.
Step Four: Curl
Once dry, direct the ends of your hair in towards your face. If you have straight hair, use a big curling iron or Velcro rollers to achieve this effect, Wagner suggests.
Step Five: Sleep In Curlers
Another option is to sleep in rollers. Set the rollers so your curls angle in towards your face, then “cover your hair with a bonnet or scarf and go to sleep,” Peace says. Take the rollers out in the morning, run your fingers through your hair, and you should be good to go.
Sources:
Tara Zigler, hairstylist with Lotus Star Salon
Michelle O’Connor, hairstylist, global artistic director at Matrix
Darrius Peace, master hairstylist with Hayah Beauty
Bradley Leake, celebrity hairstylist
Amber Wagner, hairstylist, owner of Vanity Salon
This article was originally published on
