Beauty
Your 4-Step Guide To Doing Bubble Braids
Master the Y2K-inspired hairstyle.
Although it’s now 2022, a scroll through TikTok would fool you into thinking it’s Y2K all over again. On social media, Gen Z continues to recreate nostalgic trends so well you’d think they, too, were shopping at Claire’s in 2000 despite not even having been born yet. But this early-aughts obsession is especially prominent when it comes to hair: While low-cut jeans and blazing bright eyeshadow might not be everyone’s ideal throwback, everyone can appreciate super cute but easy-to-DIY hairdos.
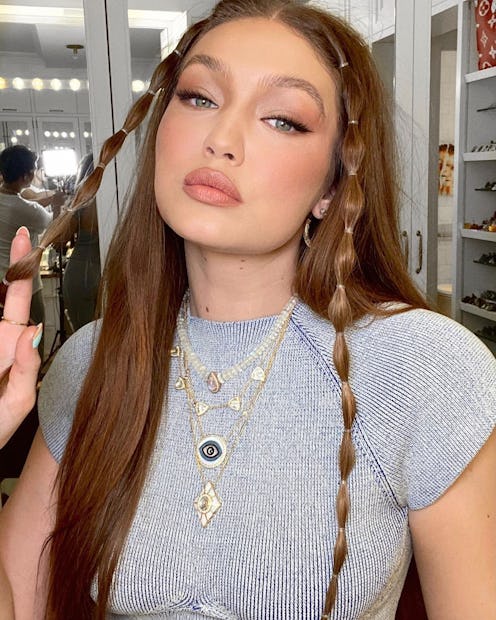
One prime example is the rising popularity of bubble braids. The whimsical yet bold look, which has been seen on celebs like Olivia Rodrigo and Gigi Hadid, is a nod to early-2000s vibes and happens to be a cinch to style (hint: no actual braiding is involved). “Take any ponytail to the next level with bubble braid,” says Danielle Keasling, Ulta Beauty Pro Team member and artistic director at Biolage. Plus, the ‘do is perfect for those who prefer more low-maintenance styles, adds Nick Drewe, trends expert at e-commerce platform WeThrift. “Not all of us are gifted with the skill to whip up a French or Dutch braid at the drop of a hat,” he tells Bustle.
Ready to try the look for yourself? Read on for how to do bubble braids in just a few easy steps.
We only include products that have been independently selected by Bustle's editorial team. However, we may receive a portion of sales if you purchase a product through a link in this article.
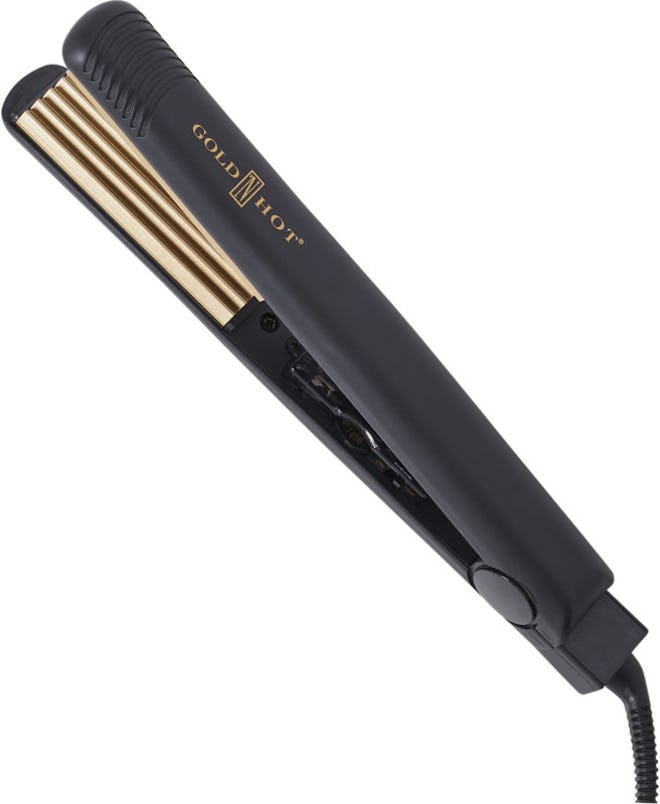
1. Wash, Blow Dry, & Crimp Your Hair
How you begin styling all depends on personal preference, and you could recreate the look after drying your hair naturally. If you’re going to use hot tools, Joseph Maine, celebrity hairstylist and co-founder of Trademark Beauty, recommends curly hair types to apply a liberal amount of heat protectant before blow-drying with a diffuser attachment. “I use a low speed, high heat setting starting at the roots and working my way down,” he tells Bustle. Jaclyn Curti, a color and extensions specialist at Eva Scrivo Salon, also suggests using a blow-dry oil before styling as it helps tame the hair.
If you want to achieve maximum volume in your bubble braids, Keasling has a pro-tip: Crimp your hair before braiding. After crimping, brush your hair out, and then bind your bubbles.


2. Divide Hair Into Ponytails
Bubble braids, like traditional braids, are incredibly versatile, and you can opt to make one large bubble ponytail or several smaller bubble braids (or pigtails). “Bubble braids don't have to live on the scalp, they can live in a ponytail and make a big impact,” says Keasling.
If you want to experiment with two braids, Keasling suggests starting in the front left section. “Part two inches away from the hairline, diagonally,” she explains. Then, secure the tail with an elastic at the base.


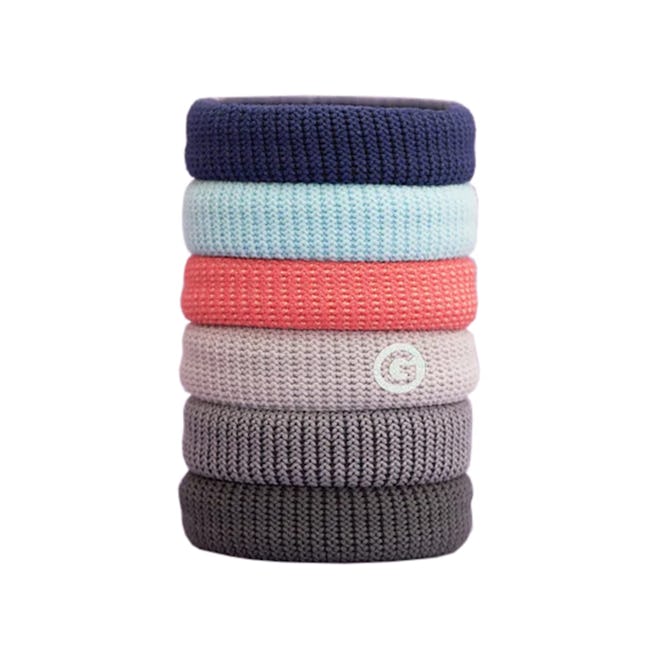
3. Tie Elastics
As you prepare to use rubber bands, know that there’s no rule as to how many you should have in each braid. That said, more bands mean more “bubbles,” which look more like standard braids and works well if you’re dividing your hair into several small ponies. Fewer bands — at least three or four — are generally more suitable for one large ponytail, says Curti, nodding to Tessa Thompson’s bubble pony.
Continue adding elastics along the ponytail (or pigtail) one to two inches apart, moving away from the scalp and down. “Make sure to start at the top right at the nape, so you work from top to bottom as you pinch and pull,” Keasling says.
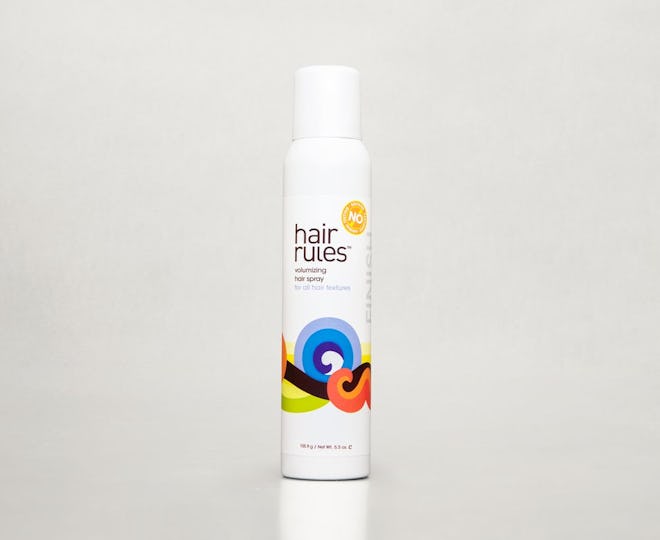
4. Add Finishing Touches
Finally, Keasling and Dan Williams, a hair artist at Hair and Co BKLYN, suggest finishing the look with hairspray to ensure the shape holds. And if you’re feeling really festive, you can wrap your hair-ties in ribbons or clip in some colorful barrettes for an even more eye-catching style.


This article was originally published on
